Planning Your Extra Large Chicken Coop
Building an extra-large chicken coop is a rewarding project that provides your flock with a safe and comfortable home. Proper planning is crucial for ensuring the coop meets your chickens’ needs and complies with local regulations. This guide breaks down the essential steps, making the process straightforward, even for beginners. Careful consideration during the planning phase saves time, money, and ensures the well-being of your chickens. Think of it as the blueprint for a successful and enjoyable chicken-keeping experience. A well-planned coop provides adequate space, protection from the elements, and easy access for cleaning and maintenance.
Determining Coop Size and Location
The size of your chicken coop directly impacts the health and happiness of your flock. Overcrowding can lead to stress, pecking order issues, and the spread of diseases. Furthermore, the location of your coop is equally important for the health and safety of your chickens. Consider factors like sunlight, wind, and ease of access when choosing the right spot for your extra-large chicken coop. Evaluate your space to guarantee a sustainable, healthy environment for both you and your birds.
Calculating Space per Chicken

A general rule of thumb is to provide at least 4 square feet of space per chicken inside the coop and 8-10 square feet in the run. For an extra-large coop, these numbers will increase proportionally with the size of your flock. Consider the breed of chickens you intend to keep, as larger breeds may require more space. Be sure to account for nesting boxes and roosting bars when calculating the interior space. This ensures your chickens have enough room to move around, roost comfortably, and lay their eggs without feeling cramped.
Choosing the Right Location
Select a location that offers good drainage to prevent water accumulation, which can lead to muddy conditions and disease. Ensure the area receives both sunlight and shade throughout the day to regulate the coop’s temperature. Accessibility is also important; the coop should be easily accessible for daily care, cleaning, and collecting eggs. Consider the prevailing wind direction and position the coop to minimize drafts in the winter. Furthermore, check local ordinances regarding setback requirements and any restrictions on coop placement.
Gathering Materials and Tools
Once you have a plan in place, it is time to gather the necessary materials and tools. A well-stocked workspace is critical to a smooth and efficient building process. Create a detailed list of materials and tools, checking the list multiple times to avoid any delays or the need for extra trips to the hardware store. Also, remember that the quality of the materials directly impacts the longevity and durability of your coop. Choose materials that are weather-resistant and appropriate for your climate.
Essential Materials Checklist

Your materials list should include lumber for the frame, walls, and roof, such as pressure-treated wood for ground contact and cedar or redwood for weather resistance. You’ll need roofing material (shingles, metal, or corrugated panels), hardware cloth or wire mesh for the run and ventilation, nesting box materials, roosting bars, and various fasteners (nails, screws, bolts). Don’t forget essentials like exterior-grade paint or sealant, hinges, latches, and any additional materials needed for predator-proofing. Ensure that all wood is untreated or food-grade, which is safer for the chickens. This list ensures you have everything you need from the start.
Necessary Tools for Construction
The required tools depend on the complexity of your design but generally include a circular saw, drill, measuring tape, level, hammer, staple gun (for hardware cloth), and safety glasses. A miter saw can be helpful for making precise cuts. Consider a post-hole digger or auger if you’re building a coop with a deep foundation. Also, you will need a saw for cutting lumber and possibly a router for decorative edges. Always prioritize safety by wearing appropriate personal protective equipment. Have the right tools on hand will make the building process much easier and more enjoyable.
Building the Coop Foundation and Frame
A solid foundation is the cornerstone of a long-lasting coop. This step ensures the coop is level, stable, and protected from ground moisture. The frame provides the structure and shape of the coop. This is where the building process begins to take form. Careful construction at this stage ensures that all subsequent steps are easier and more effective, resulting in a more stable and durable coop.
Constructing the Base and Floor

The base of your coop can be a concrete slab, a raised wooden frame, or a gravel base. For a wooden frame, use pressure-treated lumber for the foundation to prevent rot. Ensure the base is level before attaching the floor. The floor itself can be made of plywood, but consider covering it with linoleum or other easy-to-clean material to prevent moisture and make cleaning easier. Proper drainage is also essential to prevent water from seeping into the coop.
Building the Walls and Framing
Once the base is complete, construct the walls using your chosen lumber. Use a level to ensure the walls are straight and plumb. Frame the walls using studs and top plates, spacing the studs appropriately. Consider adding bracing for additional structural support. When framing, carefully measure and cut all the lumber to ensure a snug fit. Secure the walls to the base frame using appropriate fasteners. Consistent measuring will make your coop sturdy, stable, and secure.
Adding the Roof and Weatherproofing
A well-constructed roof protects your chickens from the elements and contributes to the overall durability of the coop. Weatherproofing is essential to keep the coop dry and comfortable throughout the year. These steps prevent water damage and help maintain a stable internal temperature. Investing time in the roof and weatherproofing will protect your flock and extend the coop’s lifespan.
Choosing the Right Roofing Material

Common roofing options include asphalt shingles, metal roofing, and corrugated plastic panels. Asphalt shingles are cost-effective but may not last as long as metal. Metal roofing is more durable and reflects heat, making it a good choice for warmer climates. Corrugated plastic panels are lightweight and easy to install but may not provide as much insulation. Ensure that the chosen material is appropriate for your local weather conditions and matches the overall design of the coop.
Ensuring Proper Ventilation and Weather Protection
Ventilation is critical to regulate temperature and remove moisture and ammonia from the coop. Install vents near the roofline to allow air circulation. Weatherproof the coop by sealing all gaps and cracks to prevent drafts and water intrusion. Apply exterior-grade sealant to seams and joints, and consider using weatherstripping around doors and windows. A well-ventilated, weatherproofed coop contributes significantly to the health and comfort of your chickens.
Creating Interior Features for Your Coop
The interior features of your coop are essential for providing comfort and functionality for your chickens. Nesting boxes, roosting bars, and easy access for cleaning are important considerations when designing your coop’s interior. Thoughtful planning will make the coop a comfortable home for your chickens, making egg collection and maintenance easier.
Designing and Installing Nesting Boxes

Nesting boxes should be placed in a quiet, dark location within the coop. Provide one nesting box for every 3-4 hens. Nesting boxes can be made from wood or plastic and should be easily accessible for egg collection. Ensure the boxes are comfortable, with a soft bedding material like straw or wood shavings. Position the boxes off the ground to prevent dampness and reduce the chance of parasite infestation. Keep the nesting boxes clean to encourage egg-laying.
Setting Up Roosts and Perches
Roosts provide a place for chickens to sleep and rest at night. Position roosting bars at a height that is comfortable for your chickens. Roosts should be wide enough for the chickens to perch comfortably, usually 2-4 inches wide. The length should accommodate all your chickens. Ensure the roosts are made of smooth, non-splintering wood. Space the roosts apart to allow for adequate space. This prevents overcrowding and promotes healthy sleep habits.
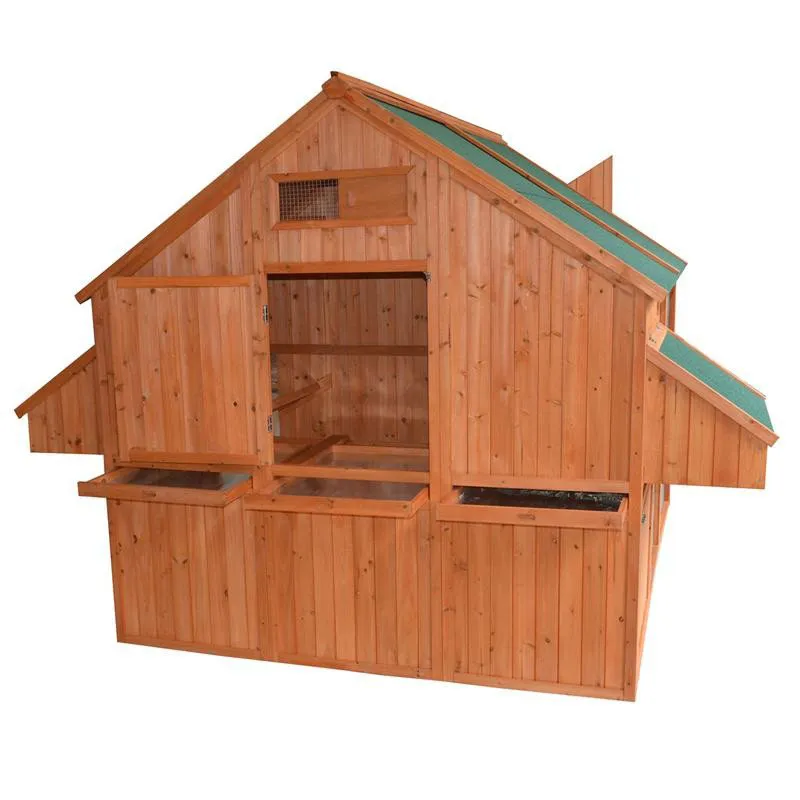
Adding Doors, Windows and Access Points
Well-placed doors, windows, and access points make it easier to manage your flock. These features ensure good ventilation, provide natural light, and facilitate cleaning and maintenance. Proper placement of these elements improves the convenience and functionality of your extra-large chicken coop, ensuring ease of access for both you and your chickens.
Installing Secure Doors and Latches

The doors of your coop should be sturdy and securely latched to prevent predators from entering. Use strong hinges and reliable latches that can withstand tampering. Consider using a double-latch system or a latch with a locking mechanism for added security. Make sure the door frames are flush with the door, ensuring a tight seal. Regularly inspect the doors and latches for wear and tear, and perform maintenance as needed.
Adding Windows for Light and Ventilation
Windows provide natural light and ventilation, which are essential for the health and well-being of your chickens. Install windows high enough to prevent chickens from escaping. Use hardware cloth or wire mesh over windows to prevent predators from entering. Ensure the windows can be opened and closed easily to regulate airflow. Consider using adjustable vents or sliding windows for optimal ventilation. Adequate lighting and ventilation will significantly enhance the comfort of your chickens.
Securing the Coop Against Predators
Protecting your chickens from predators is critical for their safety. Predator-proofing your coop requires a multi-faceted approach, including the use of sturdy materials, secure construction techniques, and regular maintenance. This section provides guidelines to protect your chickens from common predators.
Preventing Common Predators
Common chicken predators include foxes, raccoons, coyotes, dogs, and birds of prey. Use hardware cloth or wire mesh with small openings for the run and ventilation openings to prevent predators from entering. Bury the wire mesh around the perimeter of the run to prevent digging predators. Ensure the coop is fully enclosed and that all access points are secured with strong latches. Consider adding an electric fence around the perimeter of the run for added protection.
Reinforcing Coop Structure
Reinforce the coop’s structure with sturdy materials. Use pressure-treated lumber and ensure all joints are securely fastened. Bury the wire mesh at least 12 inches deep to prevent digging predators. Use heavy-duty latches and hinges on doors and windows. Inspect the coop regularly for any signs of damage or weaknesses and perform repairs promptly. Regularly checking the structure ensures continued protection for your chickens.
Maintaining and Cleaning Your Coop
Regular maintenance and cleaning are crucial for maintaining a healthy environment for your chickens. These practices help prevent the spread of diseases, reduce odors, and ensure the longevity of your coop. A consistent cleaning schedule also makes the tasks more manageable and reduces overall labor.
Regular Cleaning Schedule
Clean the coop regularly. Remove droppings and soiled bedding daily. Replace the bedding in the nesting boxes weekly. Deep-clean the entire coop monthly by removing all bedding, scrubbing surfaces with a poultry-safe disinfectant, and allowing it to dry completely before replacing the bedding. Regular cleaning prevents disease and maintains a healthy environment for your chickens. A well-maintained coop is key to keeping a healthy flock.
Maintaining Structural Integrity
Regularly inspect your coop for any signs of wear and tear. Check for loose screws, cracks, or damage to the structure. Repair any damage promptly to prevent further deterioration. Apply paint or sealant as needed to protect the wood from the elements. Maintaining the structural integrity of your coop will extend its lifespan and provide a safe and secure home for your chickens for years to come.