Planning Your Chicken Coop from Shed
Embarking on a chicken coop from shed project can be a rewarding endeavor, providing fresh eggs and a charming addition to your backyard. However, success hinges on meticulous planning. Before you even pick up a tool, take the time to outline your goals, assess your existing shed, and research local regulations. This initial phase is crucial for preventing costly mistakes and ensuring a safe, comfortable home for your flock. Consider the number of chickens you plan to keep, their breeds, and their specific needs. Different breeds have different space requirements and temperaments, which will influence the design and size of your coop. A well-thought-out plan will streamline the construction process and contribute to the long-term health and happiness of your chickens.
Assess Your Shed’s Suitability
Not every shed is ideally suited for a chicken coop conversion. Start by carefully inspecting your shed’s structural integrity. Look for signs of rot, pest damage, or structural weaknesses that might compromise the safety of your chickens. The foundation should be sound and level to prevent water from pooling and ensure proper drainage. Consider the materials used in the shed’s construction. Pressure-treated lumber is generally recommended for areas that will be in contact with the ground or exposed to moisture. Ensure the shed has adequate ventilation, as chickens produce a significant amount of moisture and ammonia. Evaluate the existing windows and doors, which may need modifications or additions to provide proper airflow and security. A thorough assessment will help you identify potential challenges and make informed decisions about necessary repairs or modifications before you begin.
Size and Space Considerations

Providing sufficient space is paramount for the well-being of your chickens. Overcrowding can lead to stress, disease, and behavioral problems like feather pecking. As a general rule, allow at least 4 square feet of floor space per chicken inside the coop and 8-10 square feet per bird in the outdoor run. The size of your shed will dictate how many chickens you can comfortably house. When planning, consider the breed of chickens, as larger breeds need more space than smaller ones. Think about future expansion if you plan to add more chickens later. Beyond the square footage, consider the height of the coop. Chickens need enough headroom to move around comfortably, especially when roosting or during cleaning. Ensure there is enough space for essential features such as nesting boxes, roosting bars, and a feeder and waterer, without making the coop feel cramped. Proper planning will provide a comfortable and safe environment for your flock.
Necessary Permits and Regulations
Before you begin construction, research local ordinances and regulations regarding chicken coops. Many municipalities have specific rules about the size, location, and construction of coops, as well as the number of chickens allowed. Some areas may require permits, while others have restrictions on noise, odor, or proximity to property lines. Failure to comply with these regulations can result in fines or even the forced removal of your coop. Check with your local zoning office or building department to determine the requirements in your area. It’s also wise to check with your homeowner’s association (HOA), if applicable, as they may have additional restrictions. Obtaining the necessary permits and complying with local regulations from the start will save you time, money, and potential headaches in the long run.
Designing the Chicken Coop from Shed
Once you have a solid plan, it’s time to design your chicken coop from shed. Consider both the functional needs of your chickens and the aesthetic appeal of the coop in your backyard. The design should prioritize safety, security, and ease of maintenance. Think about how you will access the coop for cleaning, collecting eggs, and providing food and water. A well-designed coop will make these tasks easier and more efficient. Proper ventilation is essential to remove moisture and ammonia buildup, which can harm your chickens’ health. Consider incorporating features such as a covered run area to protect your chickens from the elements and predators. The design phase is an opportunity to get creative and personalize your coop, making it a functional and attractive addition to your property. Create a design plan based on your measurements. This will aid in creating your shopping list and avoiding costly mistakes.
Floor Plan and Layout

A well-thought-out floor plan is essential for a functional chicken coop. The layout should maximize space and provide easy access for both you and your chickens. Consider the placement of key elements such as nesting boxes, roosting bars, feeders, and waterers. Nesting boxes should be in a dark, quiet location, away from the main traffic areas. Roosting bars should be elevated and positioned away from the nesting boxes to prevent droppings from contaminating the eggs. Position feeders and waterers to minimize mess and ensure easy access. Think about the flow of movement within the coop. Ensure you can easily access all areas for cleaning and maintenance. Consider incorporating multiple doors and windows to facilitate ventilation and natural light. A well-designed floor plan will contribute to the overall efficiency and comfort of your chicken coop.
Ventilation and Lighting
Proper ventilation and lighting are crucial for the health and productivity of your chickens. Good ventilation helps remove moisture, ammonia, and other harmful gases, reducing the risk of respiratory illnesses. Install vents near the roofline to allow for air circulation. Avoid placing vents where drafts can directly hit the chickens. Ensure there is adequate natural light, as chickens need at least 14-16 hours of light per day to lay eggs consistently. Consider adding windows or a clear roof panel to maximize natural light. If you live in an area with harsh winters or limited daylight hours, you may need to supplement with artificial lighting. Use a low-wattage LED bulb to avoid overheating the coop. Position lights carefully to avoid creating shadows or disturbing the chickens’ sleep. Proper ventilation and lighting will contribute to a healthy and productive flock.
Nesting Boxes and Roosting Bars
Nesting boxes and roosting bars are essential features of a chicken coop. Nesting boxes provide a safe and comfortable place for hens to lay their eggs. A general guideline is to provide one nesting box for every 3-4 hens. The boxes should be large enough for the hens to comfortably turn around and settle. They should be in a dark, quiet location, away from the main traffic areas. Line the boxes with clean, soft bedding such as straw, wood shavings, or pine needles. Roosting bars provide a place for chickens to sleep at night. Position the bars at a comfortable height, about 2-3 feet above the floor. Ensure the bars are wide enough for the chickens to grip comfortably. Place the roosting bars away from the nesting boxes to prevent droppings from contaminating the eggs. Regularly clean and maintain the nesting boxes and roosting bars to promote hygiene and prevent the spread of disease.
Building the Chicken Coop from Shed

With your design finalized, it’s time to build your chicken coop from shed. This phase requires careful execution and attention to detail. Start by gathering all the necessary materials and tools. Having everything organized will streamline the construction process and save you time and effort. If your shed needs any repairs, address them before you begin modifying it for the coop. Following your plans, begin constructing the interior, adding doors, windows, and any other features you designed. The construction should prioritize the safety and security of your chickens. Proper building practices will ensure the coop is structurally sound and withstands the elements. Consider enlisting a friend or family member to help, especially for larger projects. Patience and attention to detail will pay off in the long run, resulting in a durable and functional chicken coop.
Preparing the Shed Structure
Before you start building the interior, prepare the shed structure for conversion. Address any existing structural issues, such as rot or pest damage. Ensure the foundation is sound and level. If needed, add insulation to the walls and roof to regulate temperature and improve energy efficiency. Consider adding a moisture barrier to prevent water damage. If your shed has a dirt floor, you may want to pour a concrete slab or install a layer of gravel to improve drainage and make cleaning easier. Inspect the existing doors and windows for any gaps or weaknesses. Seal any openings to prevent drafts and deter pests. A well-prepared shed structure will provide a solid foundation for your chicken coop and contribute to its longevity.
Constructing the Chicken Coop Interior
Once the shed structure is ready, you can begin constructing the chicken coop interior. Build interior walls to create separate spaces for nesting boxes, roosting bars, and storage. Use materials that are easy to clean and disinfect, such as plywood or tongue-and-groove boards. Ensure all surfaces are smooth to prevent injury to the chickens. Install the nesting boxes and roosting bars according to your design. Choose materials that will withstand the wear and tear of daily use. Consider adding a droppings board under the roosting bars to collect manure, making cleaning easier. Think about adding storage for feed, water, and other supplies. A well-organized interior will contribute to the overall functionality and cleanliness of your chicken coop.
Adding Doors, Windows, and Ventilation

Properly designed doors, windows, and ventilation are essential for the health and comfort of your chickens. Install doors that are secure and easy to open and close. Consider adding a small, separate door for the chickens to access the run. Install windows for natural light and ventilation. Use hardware cloth to cover the windows and prevent predators from entering. Ensure that the windows are secure and can be easily opened and closed for ventilation. Install vents near the roofline to allow for air circulation. Avoid placing vents where drafts can directly hit the chickens. Consider adding a ridge vent or a cupola for enhanced ventilation. Ensure that all openings are sealed to prevent drafts and deter pests. The correct ventilation system will create a comfortable and healthy environment for your flock.
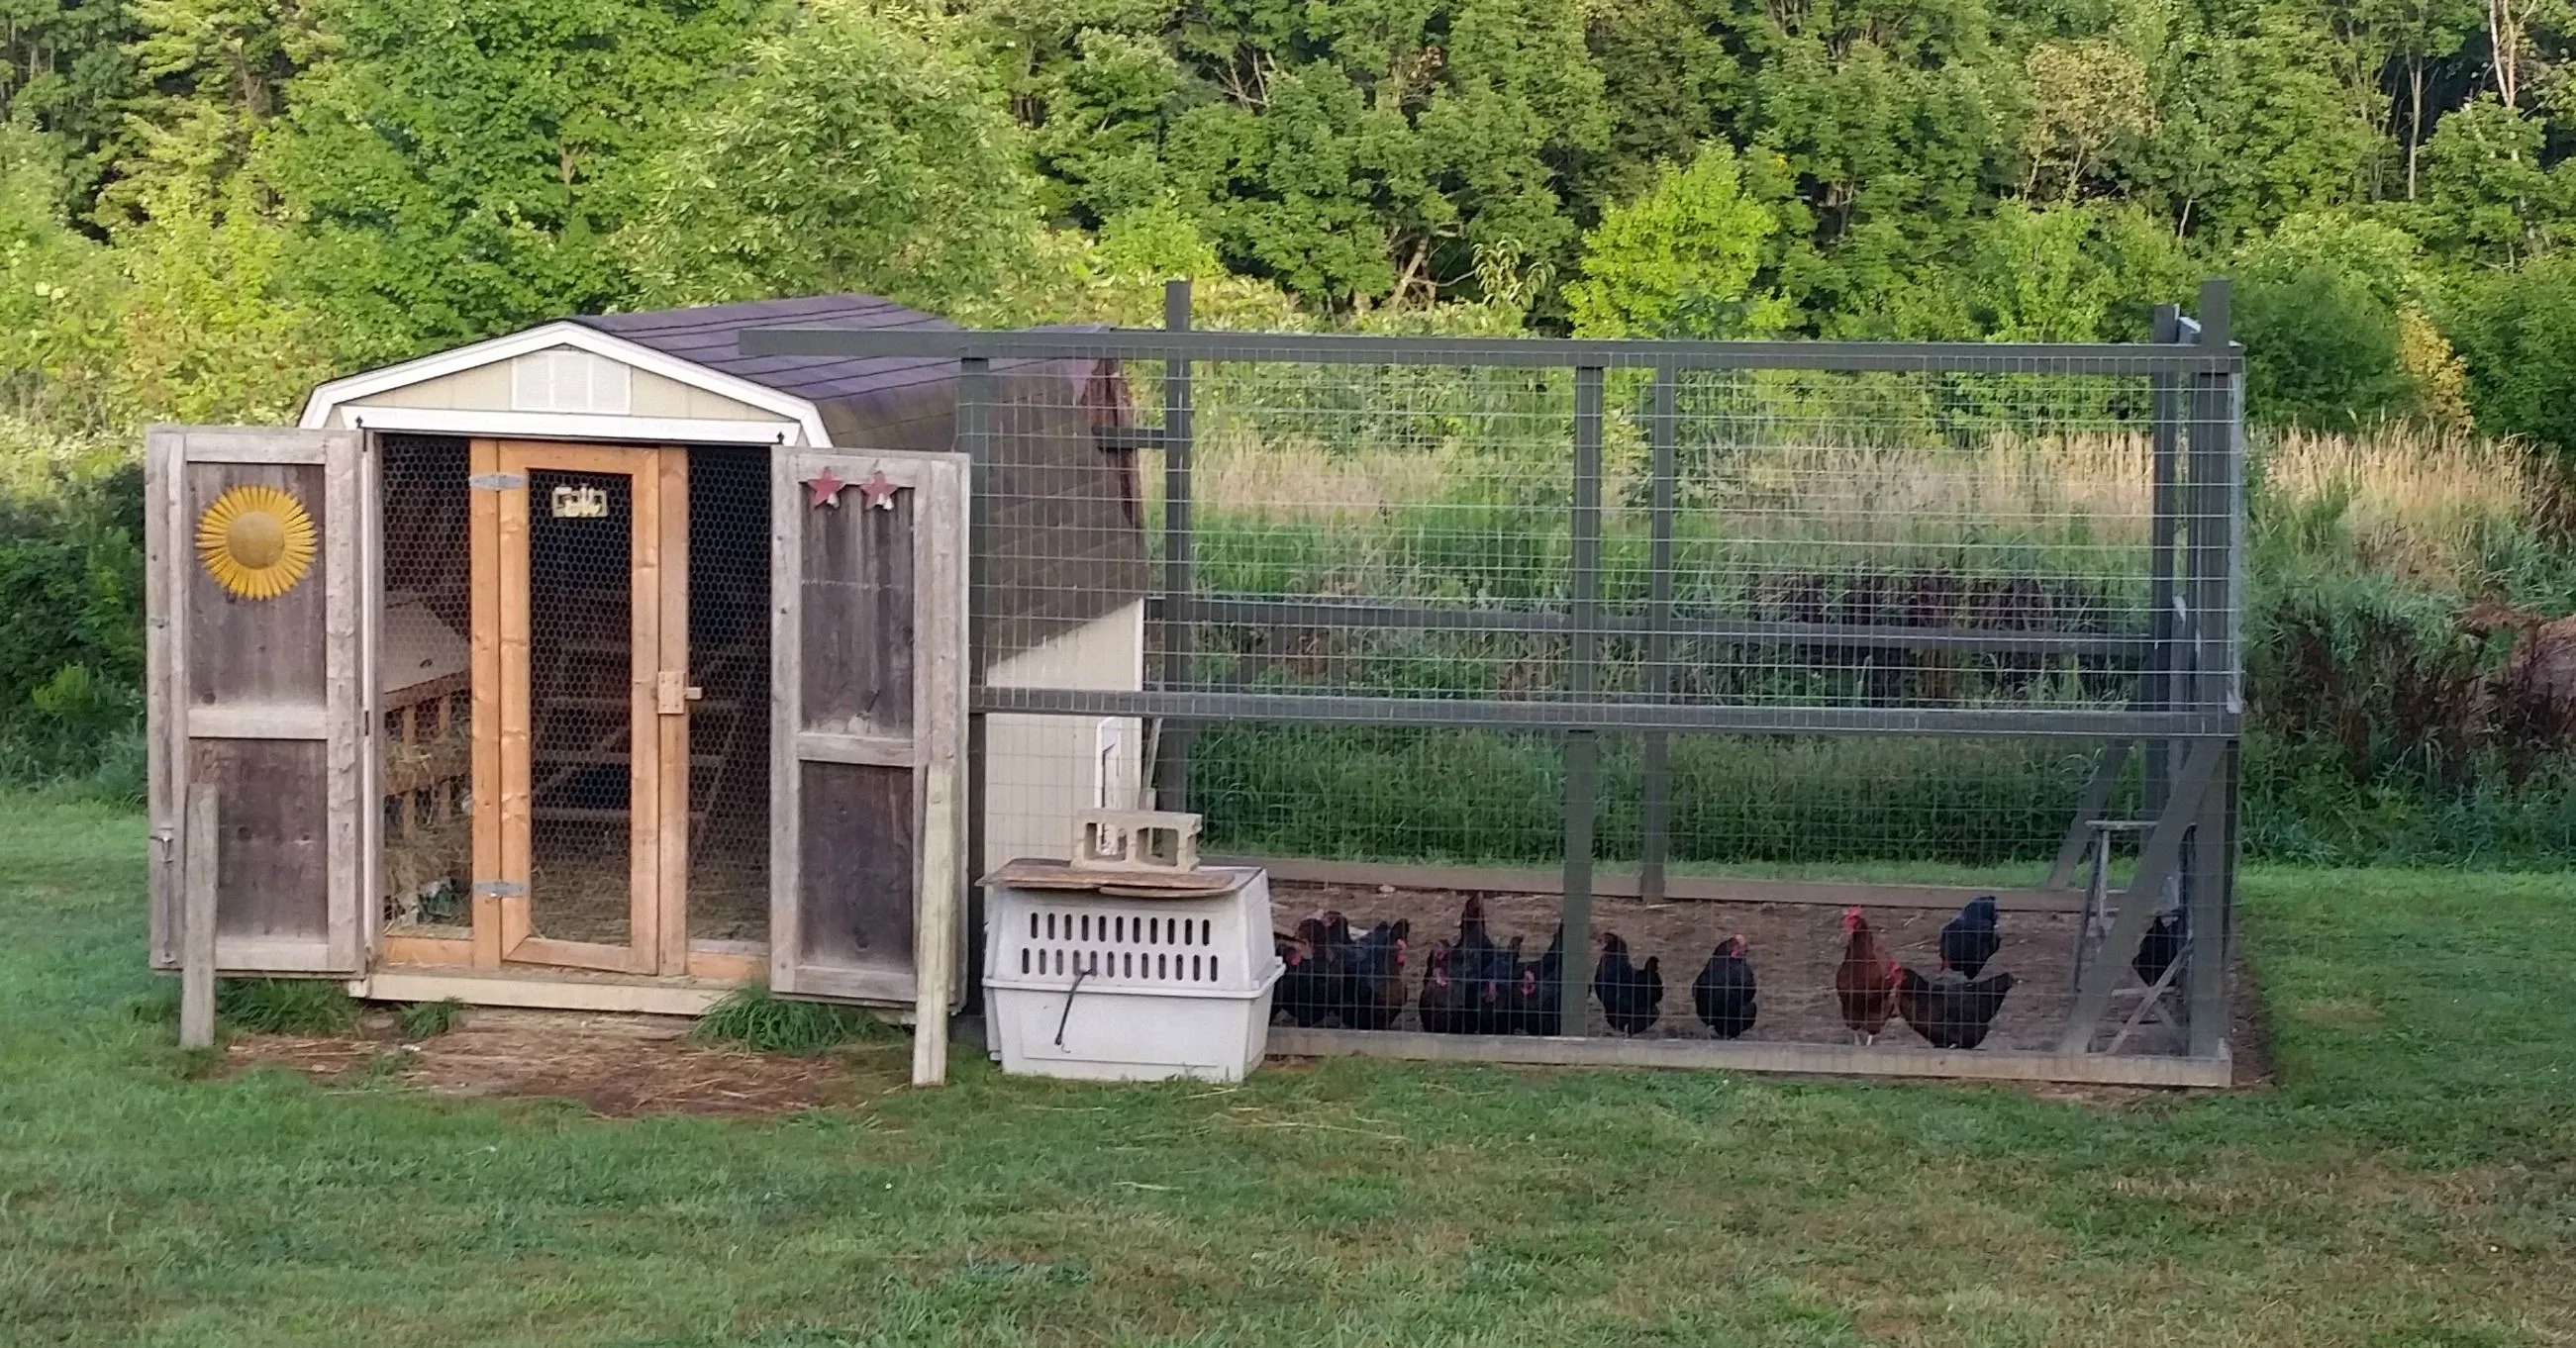
Securing the Chicken Coop from Predators
Protecting your chickens from predators is a critical aspect of coop construction. Predators can include foxes, coyotes, raccoons, opossums, hawks, and even domestic dogs and cats. Take preventative measures to keep predators out of the coop and the run. Use sturdy materials and secure construction techniques to create a predator-resistant structure. Ensure that all openings are properly sealed and covered with hardware cloth. Install a secure door with a latch that is difficult for predators to open. Bury hardware cloth around the perimeter of the coop and run to prevent digging predators from entering. Implement other deterrents, such as motion-activated lights or electric fencing, to further protect your flock. Prioritizing predator protection will minimize the risk of losing chickens and ensure their safety.
Fencing and Run Design
A secure run is essential for allowing your chickens to roam safely outdoors. The run should be constructed with sturdy fencing and buried hardware cloth to prevent predators from entering. Choose fencing material that is durable and resistant to chewing or tearing. Bury the hardware cloth at least 12 inches underground and angle it outward to prevent digging predators. Consider the size of the run. Provide at least 8-10 square feet per bird. Include features such as a covered area to protect the chickens from the sun and rain, and a designated dust bathing area. Provide a water source in the run. Regularly inspect the fence for any damage or weaknesses and make necessary repairs. A well-designed run will provide a safe and stimulating environment for your chickens.
Hardware Cloth and Secure Latches

Hardware cloth is a wire mesh that is highly effective at preventing predators from entering the coop and run. Use hardware cloth with a mesh size of 1/2 inch or smaller to prevent even the smallest predators from squeezing through. Cover all openings, including windows, vents, and doors, with hardware cloth. Secure the hardware cloth with staples or screws, ensuring that there are no gaps or weak points. Install secure latches on all doors and access points. Use latches that are difficult for predators to open, such as carabiner clips or spring-loaded latches. Regularly inspect the hardware cloth and latches for any damage or wear and tear and make necessary repairs. Properly installed hardware cloth and secure latches will significantly enhance the predator-proofing of your chicken coop.
Maintaining Your Chicken Coop from Shed
Maintaining your chicken coop is crucial for the health and well-being of your chickens and the longevity of the structure. Regular cleaning, pest control, and general upkeep will ensure that your coop remains a safe, comfortable, and sanitary environment. Establish a routine for cleaning and maintenance. This will make the tasks more manageable and prevent problems from escalating. Take the time to inspect the coop regularly, looking for signs of damage, pests, or disease. Addressing any issues promptly will prevent them from becoming major problems. A well-maintained coop will benefit both you and your chickens.
Cleaning and Hygiene Practices
Regular cleaning is essential for maintaining a healthy and hygienic chicken coop. Remove droppings, spilled feed, and soiled bedding regularly. Clean the nesting boxes frequently, replacing the bedding with fresh material. Once a month, completely clean the coop, removing all bedding, scrubbing the floors and walls, and disinfecting all surfaces. Use a poultry-safe disinfectant to kill any bacteria or viruses. Allow the coop to dry completely before replacing the bedding. Dispose of the soiled bedding properly, either by composting it or disposing of it in a designated area. Ensure fresh water and clean feed are always available. A clean and hygienic coop will minimize the risk of disease and create a comfortable environment for your chickens.
Dealing with Pests and Diseases

Pests and diseases can pose a threat to your chickens’ health. Implement preventative measures to minimize the risk. Regularly inspect your chickens for signs of pests, such as mites or lice. Treat any infestations promptly with appropriate poultry-safe products. Control rodents and other pests by keeping the coop clean, storing feed in airtight containers, and sealing any potential entry points. Vaccinate your chickens against common diseases, as recommended by your veterinarian. Quarantine any sick chickens and seek veterinary advice. Monitor your flock for any signs of illness, such as changes in behavior, appetite, or egg production. Early detection and treatment of pests and diseases will help to maintain a healthy flock.
Building a chicken coop from a shed is a rewarding project that can provide you with fresh eggs and a connection to nature. By following these guidelines and taking the time to plan, design, and build your coop carefully, you can create a safe, comfortable, and functional home for your flock. Remember to prioritize the well-being of your chickens and adhere to local regulations. With proper care and maintenance, your chicken coop will provide years of enjoyment and fresh eggs.