Creating a comfortable and functional space for your chickens to lay their eggs is essential for any backyard chicken keeper. Chicken coop nesting boxes are a critical part of this, providing a safe and secure environment that encourages hens to lay regularly. Building your own nesting boxes can be a rewarding DIY project, saving you money and allowing you to customize the design to fit your coop and flock’s specific needs. This guide will walk you through the process, from choosing the right materials to the final installation, ensuring your chickens have the perfect place to call home.
Choosing the Right Chicken Coop Nesting Boxes
Selecting the right nesting boxes is the first step to a successful and happy flock. The design and features of your nesting boxes directly impact the comfort of your hens and the cleanliness of your eggs. There are several factors to consider when choosing or building nesting boxes, ranging from size and dimensions to the materials you will use. Taking the time to properly plan will result in a better experience for you and your chickens.
Size and Dimensions
The size of your nesting boxes is a crucial factor. As a general guideline, each box should be approximately 12 inches wide, 12 inches deep, and 12 inches high. However, the specific size can vary depending on the breed of your chickens. Larger breeds may require slightly larger boxes. Make sure the boxes are not too big, as hens tend to prefer a cozy, enclosed space. Consider the available space within your coop, and always keep in mind your chickens’ comfort.
Number of Boxes Needed

A common rule of thumb is to provide one nesting box for every 3-4 hens. However, it’s always a good idea to have a few extra boxes available, as hens may sometimes compete for their favorite spots. This reduces the chances of egg breakage. It’s better to have too many boxes than not enough. Consider your flock’s size and future growth when determining the number of nesting boxes to build or purchase.
Materials for Construction
The materials you choose for your nesting boxes will impact their durability, ease of cleaning, and overall suitability for your chickens. Different materials offer different advantages, so it is important to consider all factors. Wood is a classic option, known for its natural appearance and insulation properties. Plastic offers ease of cleaning and resistance to pests. Metal is durable, and offers a sleek, modern look. Make sure to use materials that are non-toxic and safe for your chickens.
Wood
Wood is a traditional and popular choice. It provides good insulation, keeping the boxes warmer in winter and cooler in summer. Untreated wood is a safe option, but it can be prone to absorbing moisture and attracting mites. Using a sealant can make it easier to clean. Ensure that the wood is free of splinters and sharp edges to prevent injury to your hens. Pine and cedar are common choices, with cedar offering natural insect-repelling properties.
Plastic

Plastic nesting boxes are easy to clean and disinfect, making them a hygienic option. They are also resistant to pests and moisture. However, plastic may not provide the same level of insulation as wood, and they can be less aesthetically pleasing. Plastic boxes are lightweight and easy to handle. They can be a great choice for beginners or for those seeking a low-maintenance option.
Metal
Metal nesting boxes are incredibly durable and long-lasting. They are also easy to clean. However, metal can get very hot in the summer and cold in the winter, potentially affecting egg production and hen comfort. Make sure that any metal edges are smooth and that there are no sharp points. Galvanized steel is a common choice, offering good resistance to rust and corrosion.
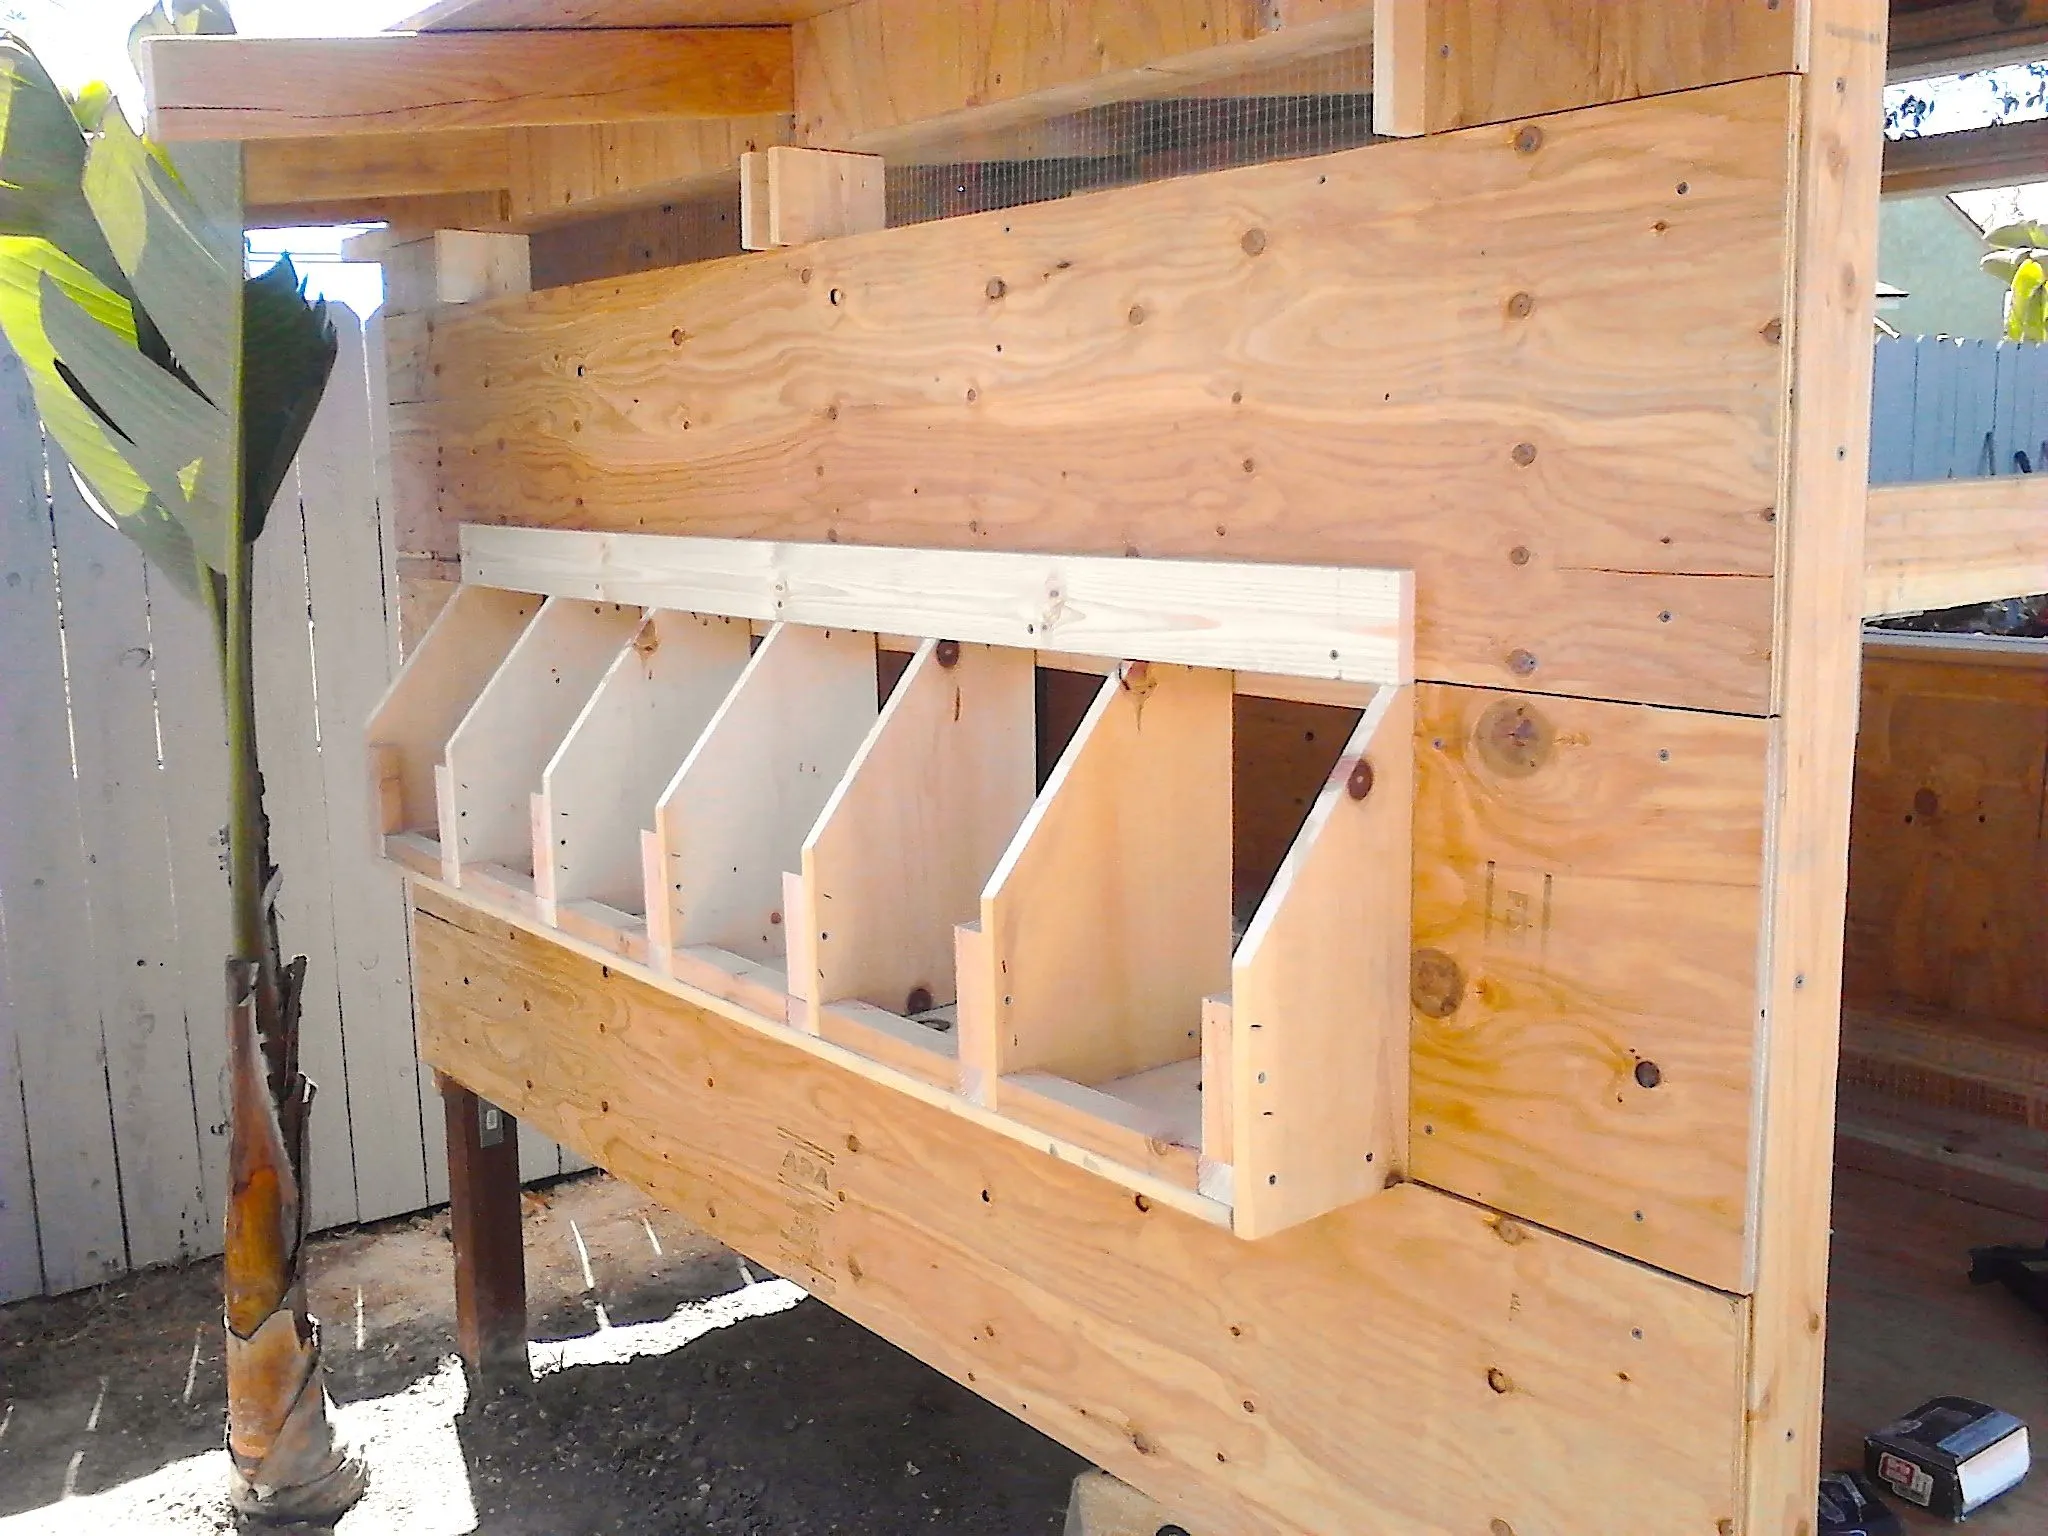
Building Your Nesting Boxes Step-by-Step
Building your own nesting boxes can be a straightforward and rewarding DIY project. By following these steps, you can create customized nesting boxes that are perfectly suited to your coop and your chickens. Always prioritize safety and use appropriate tools and protective gear. Take your time during the process and double-check all measurements before cutting or assembling any materials.
Step 1 Planning and Design

Before you begin, carefully plan your design. Decide on the number of boxes you need, their dimensions, and the materials you will use. Draw a simple plan or sketch to visualize the construction. This will help you determine the exact measurements and cut list. Consider the layout of your coop and how the boxes will be mounted. Having a clear plan will streamline the building process and minimize errors.
Step 2: Cutting the Materials
Carefully measure and cut all materials according to your plan. Use a saw appropriate for the material you have chosen. Ensure your cuts are precise and straight to ensure proper assembly. Sand any rough edges to prevent splinters and create a smooth surface. Double-check all measurements before cutting to avoid wasting materials. Wear appropriate safety gear such as safety glasses and gloves when using power tools.
Step 3: Assembly
Assemble the boxes using screws, nails, or other appropriate fasteners. Ensure all joints are secure and the boxes are square. Use wood glue for added strength. If you are using wood, consider pre-drilling holes to prevent splitting. Check that the boxes are level and stable before adding the bedding. A well-constructed box will last for years and provide your chickens with a secure place to lay their eggs.
Step 4: Finishing Touches

Once the boxes are assembled, sand any rough spots. If using wood, apply a sealant or paint that is safe for use around animals. This will protect the wood and make cleaning easier. Add any desired features, such as a small lip at the front to prevent eggs from rolling out. Ensure all surfaces are smooth and safe for your chickens before placing the boxes in the coop.
Placement and Installation
Proper placement and installation of your nesting boxes are crucial for encouraging your hens to use them regularly. Positioning them in the right location and ensuring they are securely mounted will help maximize egg production and minimize egg loss. Consider the overall environment of your coop and how it might impact your chickens.
Ideal Location
Place nesting boxes in a quiet, secluded area of the coop. Chickens prefer to lay their eggs in a safe and private space. Avoid placing the boxes in direct sunlight or drafts. Consider the height of the boxes, they should be off the ground and easy for your chickens to access. Easy access encourages regular use and reduces stress. Ensure the boxes are not in a high-traffic area, or near the chickens’ roosting area.
Mounting and Securing

Securely mount the nesting boxes to the coop wall or floor. This prevents them from tipping over and ensures the safety of your chickens. Use appropriate screws or bolts to attach the boxes firmly. Make sure the boxes are level and stable. Consider adding a small ramp or step to help your chickens access the boxes, especially if they are elevated. Regularly check the mounting hardware to ensure the boxes remain secure.
Creating a Comfortable Environment
The comfort of your nesting boxes plays a crucial role in the overall success of your flock. Ensuring that nesting boxes are designed to provide a comfortable and inviting place to lay is important. Comfortable boxes encourage egg production and reduce stress. By following these tips, you can provide a nesting environment that your chickens will love.
Bedding Materials
Provide soft, clean bedding in your nesting boxes. This will cushion the eggs and provide a comfortable space for your hens. Straw, hay, wood shavings, and shredded paper are all suitable options. Avoid using materials that can easily trap moisture or harbor mites. Change the bedding regularly to maintain hygiene and prevent odors. Consider the absorbency of each material, ensuring that the bedding will stay dry.
Maintaining and Cleaning Nesting Boxes

Regular maintenance and cleaning of your nesting boxes are essential for the health and productivity of your flock. A clean environment helps prevent diseases and parasites, ensuring your hens’ well-being. Regular cleaning will also help maintain a hygienic environment for collecting eggs. Create a cleaning schedule and stick to it for best results.
Regular Cleaning Schedule
Clean nesting boxes regularly, at least once a week. Remove soiled bedding and replace it with fresh material. Wipe down the inside of the boxes with a mild disinfectant. This will help prevent the build-up of bacteria and odors. Consider a deeper cleaning once a month, removing the boxes completely to wash and disinfect them thoroughly. Regular cleaning promotes a healthy environment for your chickens.
Pest Control and Prevention
Implement pest control measures to prevent mites and other parasites from infesting your nesting boxes. Dust the boxes and bedding with food-grade diatomaceous earth (DE) or a similar product. DE is a natural insecticide that helps control mites and other pests. Check the boxes regularly for signs of pests and take action immediately if any are detected. Proper pest control ensures a healthy and comfortable environment for your chickens.
By following these guidelines, you can build and maintain chicken coop nesting boxes that are comfortable, safe, and conducive to egg production. Creating a good nesting environment is a vital part of chicken keeping, and it will reward you with a happy and productive flock. Remember to regularly inspect and maintain your nesting boxes to provide your chickens with the best possible living conditions.