Building a chicken coop is a rewarding project that allows you to raise your own fresh eggs and enjoy the company of these charming birds. However, before you start, having well-thought-out chicken coop plans is essential. This guide provides comprehensive information to help you design and build a suitable coop for 12 chickens, covering everything from planning and material selection to construction and maintenance. Follow these plans to create a safe, comfortable, and durable home for your flock, ensuring their well-being and your satisfaction as a chicken keeper.
Choosing the Right Chicken Coop Plans
Selecting the right chicken coop plans is the first and most important step. You need to choose plans that meet your specific needs and the needs of your chickens. Considering several crucial factors will help you make an informed decision and avoid costly mistakes. Understanding these elements from the outset will ensure your coop is functional, safe, and meets all necessary requirements.
Factors to Consider
Several factors influence your chicken coop plans. These factors range from the number of chickens you plan to house to local climate conditions. Taking these into account early on will significantly improve your overall success. Each factor plays a role in creating a functional and comfortable environment for your chickens. Ignoring these considerations can lead to a poorly designed coop that compromises your chickens’ health and your overall satisfaction.
Space Requirements

Chickens need ample space to thrive. As a general guideline, provide at least 4 square feet of floor space per chicken inside the coop. Additionally, allow for at least 8-10 square feet of outdoor run space per bird. This ensures they have enough room to move around, forage, and avoid overcrowding stress. Inadequate space can lead to behavioral issues, increased disease risk, and reduced egg production. Consider the size of your backyard and the terrain when determining the size and placement of your coop and run.
Local Regulations
Before you start building, check your local ordinances and homeowner association (HOA) regulations. Many areas have specific rules regarding chicken keeping, including coop size, placement, and noise restrictions. Obtaining the necessary permits is crucial to avoid fines or legal issues. Contact your local government or HOA to understand the requirements in your area. Ignoring these regulations could result in having to modify or remove your coop.
Budget Planning
Determine your budget before you begin. The cost of building a chicken coop can vary widely depending on the materials, size, and complexity of the design. Create a detailed budget that includes the cost of lumber, hardware, roofing, nesting boxes, and any other necessary materials. It is also essential to factor in the cost of tools you may need. Sticking to your budget will prevent overspending and help you make informed decisions during the building process.
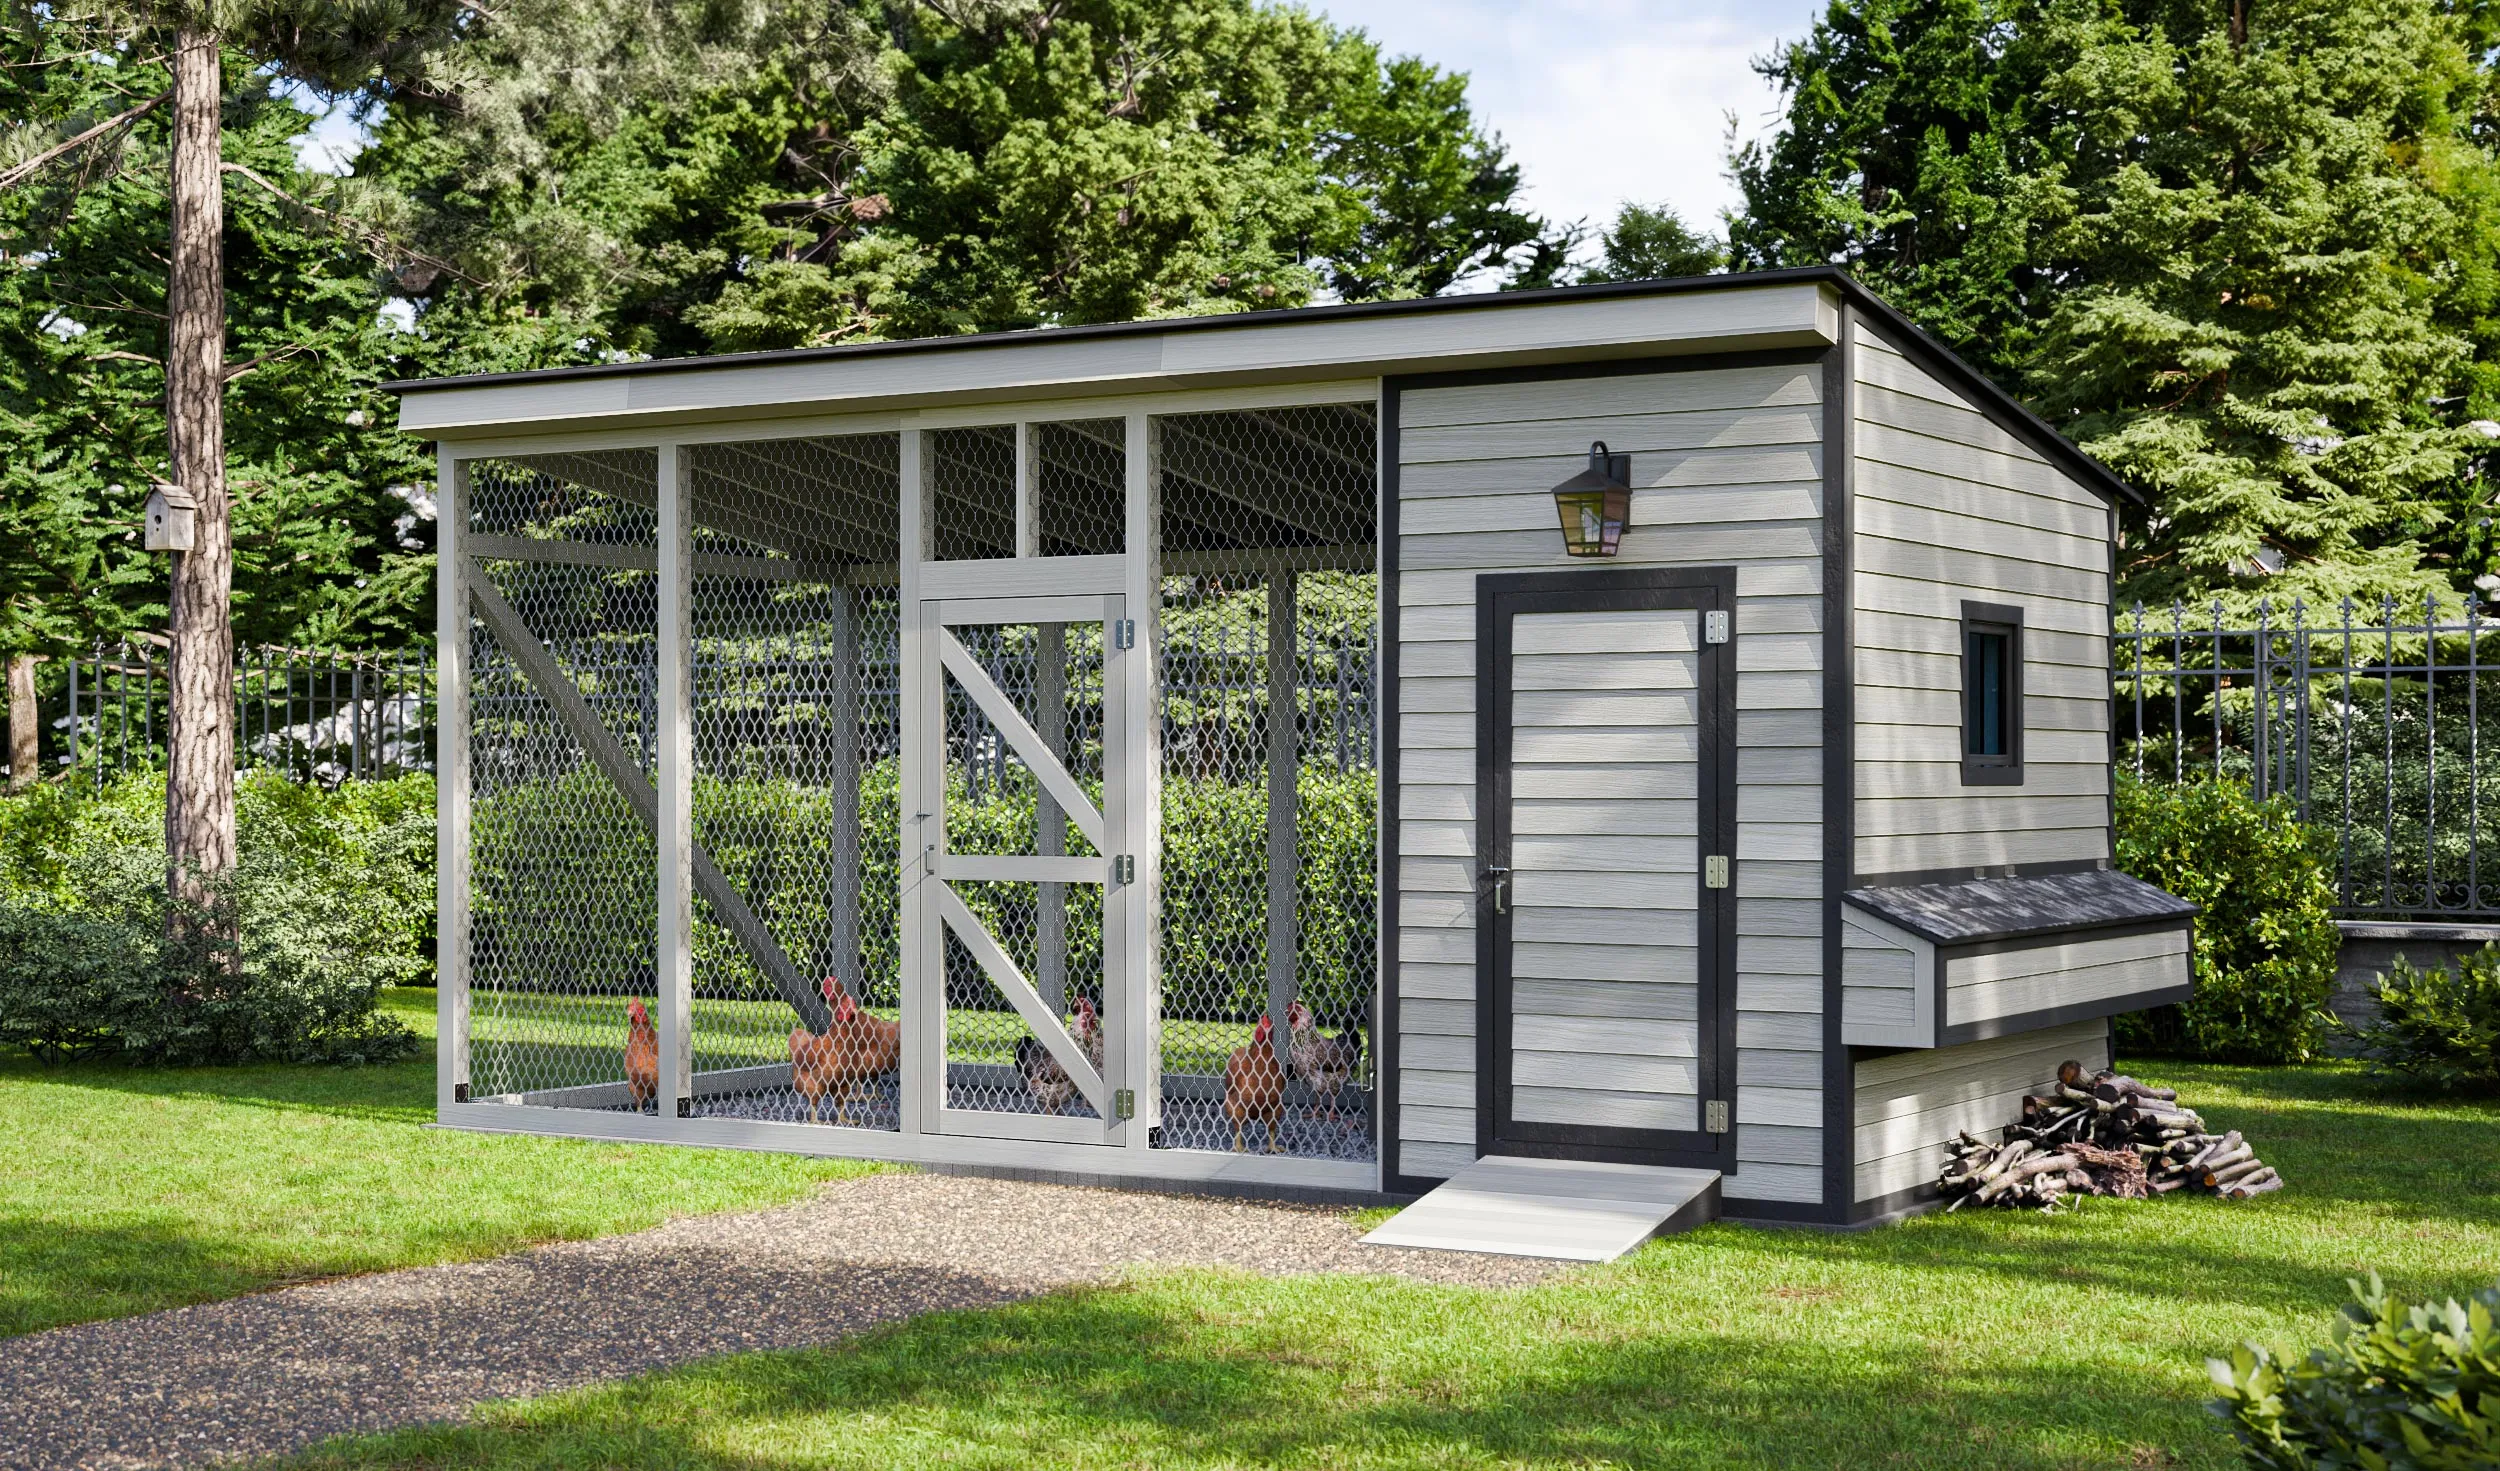
Essential Features for a 12-Chicken Coop

A well-designed chicken coop provides shelter, protection, and a comfortable living environment for your flock. Key features enhance their well-being and make your job as a chicken keeper easier. It’s essential to include several critical elements in your plans to ensure the safety and comfort of your chickens and make it easy for you to care for them. Neglecting these features can lead to health problems for your chickens and increase your maintenance workload.
Coop Size and Dimensions
For 12 chickens, a coop should have at least 48 square feet of floor space. This provides each chicken with the recommended 4 square feet. Consider the height of the coop. You should be able to stand inside comfortably to make cleaning and maintenance easier. A larger coop allows for more comfortable living and can reduce the likelihood of stress-related problems. Proper sizing is essential for the health and happiness of your chickens.
Nesting Boxes
Provide enough nesting boxes for your chickens. A general rule is to have one nesting box for every 3-4 hens. The boxes should be approximately 12 inches by 12 inches and 12 inches high. Locate the nesting boxes in a dark, quiet, and private area within the coop. Use soft bedding such as straw or wood shavings to create a comfortable laying environment. Clean nesting boxes regularly to keep them sanitary and encourage egg laying.
Roosting Bars

Install roosting bars inside the coop. Chickens naturally roost at night to feel safe and secure. Position the roosting bars at least 18 inches above the ground and provide enough length for each bird. A good estimate is 8-12 inches of roosting space per chicken. Use rounded or slightly flattened wood for the roosting bars to provide comfort for the chickens’ feet. Regular cleaning of the roosting bars helps prevent the spread of mites and other parasites.
Ventilation System
Proper ventilation is critical for maintaining air quality and preventing moisture buildup inside the coop. Install vents near the top of the coop to allow for airflow. These vents should be covered with hardware cloth to prevent predators from entering. Avoid drafts that can chill your chickens. Adequate ventilation reduces the risk of respiratory illnesses and keeps the coop environment healthy.
Security Measures
Protect your chickens from predators by incorporating robust security measures. Use sturdy materials for the coop walls and doors, and secure the coop to prevent digging underneath. Cover all openings with hardware cloth, and ensure the coop door latches securely. Consider adding an automatic coop door opener for convenience and added security. Taking these precautions will give you peace of mind knowing your chickens are safe.
Materials Selection for Durability

Choosing the right materials is crucial for building a durable and long-lasting chicken coop. Opt for materials that can withstand the elements, deter predators, and provide a healthy living environment for your chickens. Investing in quality materials will save you time, money, and effort in the long run. Carefully consider the benefits and drawbacks of different materials before making your selections.
Wood Types and Options
Wood is a popular choice for chicken coops because it is readily available and relatively easy to work with. Pressure-treated lumber is an excellent option because it resists rot and pests. Avoid using wood treated with creosote or other harmful chemicals. Cedar and redwood are naturally rot-resistant options. Consider using plywood for the walls and floor, but ensure it is properly sealed to protect against moisture. Choose wood based on durability, cost, and availability.
Hardware and Fasteners
Use high-quality hardware and fasteners to ensure your coop’s structural integrity. Galvanized screws, nails, and hinges will resist rust and corrosion, extending the lifespan of your coop. Securely fasten all joints and connections to withstand weather conditions. Opt for heavy-duty latches and locks on doors and windows to prevent predator access. Don’t skimp on hardware, as it plays a crucial role in the coop’s safety and longevity.
Roofing Materials

Select roofing material that provides adequate protection from the elements. Asphalt shingles are a cost-effective and widely available option. Metal roofing is durable and can last for many years. Ensure the roof is properly installed and sealed to prevent leaks. Consider the climate in your area and choose roofing materials that can withstand wind, rain, and snow. The roof protects your chickens and the coop’s structure from weather damage.
Step-by-Step Building Guide for Chicken Coop Plans
Building your own chicken coop can be a rewarding experience. Following a step-by-step guide will help you create a functional and attractive coop for your chickens. Ensure you have all the necessary tools and materials before you begin. Patience and attention to detail are key to a successful build. Adhering to these steps will help streamline the process and ensure a sturdy and safe coop.
Foundation and Base
Start by preparing the foundation or base for your coop. If building on the ground, level the site and consider a concrete slab or a gravel base to prevent water damage and deter digging predators. If you’re using a platform, ensure it is level and sturdy. Proper preparation is essential for a stable structure. A good foundation supports the entire coop and prevents shifting or settling over time.
Framing the Walls

Frame the walls using the dimensions from your chicken coop plans. Cut the lumber accurately and assemble the frames, ensuring they are square. Use appropriate fasteners and construction techniques to create a strong and stable wall structure. Attach the wall frames to the base or foundation securely. Framing the walls correctly is essential for the overall stability and appearance of your coop.
Constructing the Roof
Build the roof frame, following the plans for the pitch and design. Attach the roofing material, ensuring proper overlap and sealing to prevent leaks. Consider adding an overhang to protect the walls from the rain. Install a ridge vent or other ventilation system to improve airflow. A properly constructed roof protects the coop from the weather and provides a comfortable environment for your chickens.
Installing Doors and Windows
Install doors and windows in the appropriate locations. Ensure the doors swing smoothly and latch securely. Cover the windows with hardware cloth to provide ventilation and protection. Consider adding a ramp for easy access to the coop for your chickens. Correctly installed doors and windows improve accessibility, ventilation, and security of the coop.
Finishing Touches

Add finishing touches to complete your coop. Install nesting boxes, roosting bars, and feeders. Paint or stain the exterior to protect the wood and enhance its appearance. Add any desired accessories, such as a run, automatic door opener, or decorations. A well-finished coop is both functional and visually appealing, providing a welcoming environment for your chickens.
Maintaining Your Chicken Coop
Regular maintenance is essential for keeping your chicken coop clean, safe, and in good condition. Consistent care will help your coop last longer and keep your chickens healthy. These practices will prevent disease, deter pests, and ensure your chickens have a comfortable home for years to come.
Cleaning and Sanitation
Clean your chicken coop regularly to remove droppings, spilled feed, and other debris. Remove soiled bedding weekly, or more frequently if needed, and replace it with fresh bedding. Thoroughly clean the coop at least once a month, using a poultry-safe disinfectant to kill bacteria and parasites. Regular cleaning prevents the build-up of harmful organisms and maintains a healthy environment for your chickens. Cleaning is crucial for preventing diseases.
Pest Control
Implement pest control measures to prevent infestations of mites, lice, and other parasites. Regularly inspect your chickens and the coop for signs of pests. Use appropriate treatments to eliminate pests and prevent re-infestation. Maintain a clean environment and provide dust baths for your chickens. Pest control is essential to protect your chickens’ health and prevent discomfort.
Winterizing Your Coop
Prepare your coop for winter to ensure your chickens stay warm and comfortable. Insulate the coop walls and roof. Seal any drafts. Provide adequate ventilation to prevent moisture build-up. Offer extra bedding and consider adding a heat lamp. Taking these steps helps to prevent frostbite, and keeps your chickens healthy through the winter months. Preparing for winter will help them thrive in cold weather.
Conclusion
Building a chicken coop for 12 chickens is a rewarding project that provides fresh eggs and a connection to nature. By following these chicken coop plans and guidelines, you can create a safe, comfortable, and attractive home for your flock. Remember to consider all the crucial factors, from space and local regulations to materials and maintenance. Careful planning and consistent care will ensure your chickens thrive and provide you with years of enjoyment. Enjoy the process, and happy chicken keeping!