Planning Your Chicken Coop Windows
Building a chicken coop is a rewarding project, and incorporating windows is crucial for the health and happiness of your flock. Proper planning ensures your chicken coop windows provide adequate ventilation, natural light, and protection from the elements. This guide will walk you through the entire process, from assessing your coop’s needs to installing and maintaining your windows. Careful consideration of factors like climate, the number of chickens, and the coop’s location will inform your decisions about window type, size, and placement. By investing time in planning, you can create a comfortable and secure environment for your chickens, contributing to their overall well-being and productivity.
Assessing Coop Needs
Before selecting windows, evaluate your coop’s specific requirements. Consider the local climate – areas with extreme heat or cold will have different ventilation and insulation needs. The size of your flock is also a critical factor; a larger flock generates more heat and requires more ventilation. Think about the coop’s orientation relative to the sun; this affects how much natural light enters and how the coop heats up during the day. Careful assessment of these factors will ensure you choose windows that meet your chickens’ specific needs.
Ventilation Requirements

Adequate ventilation is essential for removing moisture, ammonia, and other harmful gases from the coop, preventing respiratory problems in chickens. Windows play a crucial role in this. Ensure your windows allow for sufficient airflow, especially in warmer months. The amount of ventilation needed depends on the coop size and number of chickens. Consider adding vents or other ventilation features to supplement the windows, especially in areas with high humidity or extreme temperatures. Good ventilation promotes a healthy environment for your chickens, reducing the risk of disease and improving their overall well-being. (chicken-coop-ventilation.webp)
Sunlight Considerations
Sunlight is beneficial for chickens, providing vitamin D and promoting egg production. Strategically placed windows can maximize natural light within the coop. However, direct sunlight can also overheat the coop during the summer. Consider the coop’s orientation and the placement of windows to balance light and shade. Using windows with UV-resistant glass or adding shade cloth can help regulate the amount of sunlight entering the coop, ensuring a comfortable environment for your chickens year-round.
Choosing the Right Window Type
The type of window you choose will greatly impact the functionality and effectiveness of your coop. Different window styles offer varying levels of ventilation, security, and ease of use. Consider both fixed and opening windows and evaluate their pros and cons in the context of your coop’s specific needs. The best choice depends on the climate, the level of security required, and your personal preferences. Some chicken keepers combine different window types for optimal results.
Fixed Windows

Fixed windows are non-opening windows that provide natural light and passive ventilation. They are generally more secure and easier to install than opening windows, as they don’t have moving parts. However, they offer limited control over ventilation, and the coop’s temperature can be more challenging to regulate. Consider using fixed windows in combination with other ventilation methods, such as vents or opening windows. They’re a good option for areas with mild climates or when security is a primary concern. (fixed-chicken-coop-windows.webp)
Pros and Cons
- Pros Ease of installation, increased security, and lower cost.
- Cons Limited ventilation control and inability to adjust airflow.
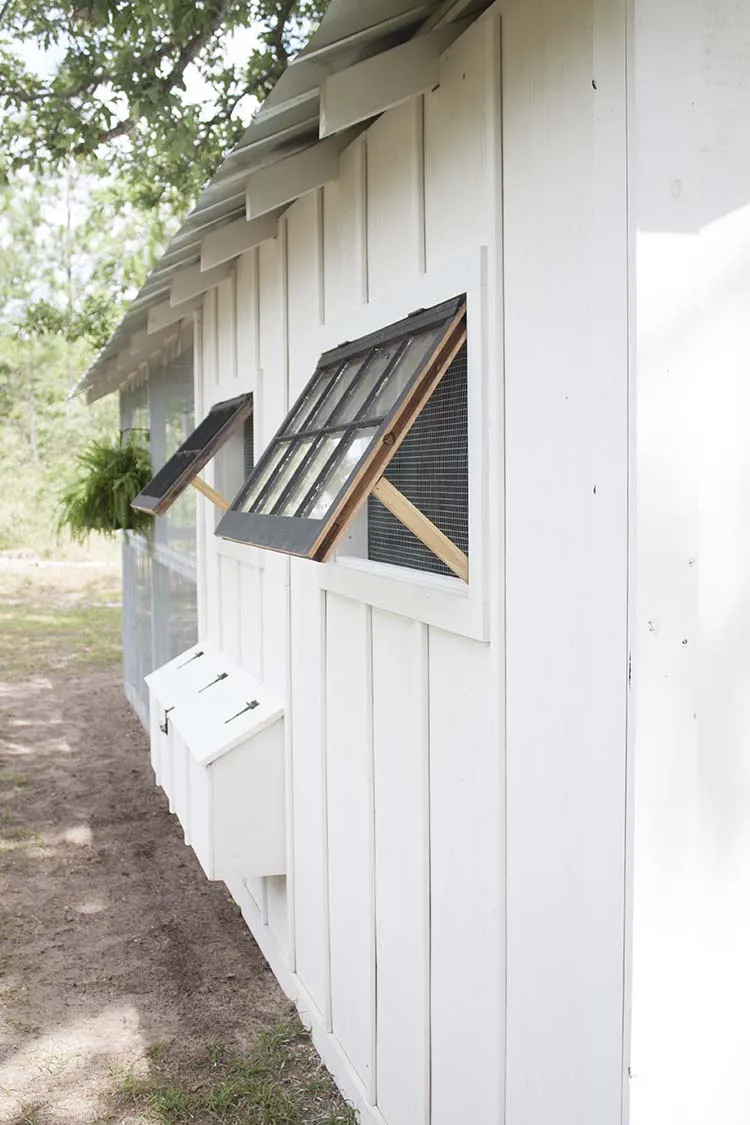
Opening Windows
Opening windows provide greater control over ventilation, allowing you to regulate airflow based on weather conditions. They can be opened to increase airflow during hot weather or closed to retain heat during cold weather. However, opening windows require more installation effort and may be less secure than fixed windows. They also have more moving parts and require more maintenance. Consider opening windows with screens to keep pests out. Hinged or sliding windows are popular choices for chicken coops.
Pros and Cons

- Pros Improved ventilation control, adaptability to changing weather.
- Cons More complex installation, potentially less secure, more maintenance required. (opening-chicken-coop-windows.webp)
Window Materials and Sizing
Selecting the right materials and sizing your windows correctly is critical for functionality, durability, and safety. Choose materials that are weather-resistant, durable, and easy to clean. The size of your windows will depend on the coop’s size, the number of chickens, and your ventilation requirements. Correct sizing ensures that your windows effectively meet your coop’s needs. Consider the materials’ ability to withstand the elements and potential predator attacks. Proper sizing allows enough natural light and airflow while maintaining a secure and comfortable environment for your chickens.
Frame Materials
Window frames can be made from various materials, each with its pros and cons. Wood is a traditional choice, offering good insulation and aesthetics, but requires regular maintenance to prevent rot. Vinyl is a low-maintenance option that is resistant to weather and pests. Metal frames, such as aluminum, are durable and strong but can conduct heat and cold. Select a material that suits your climate, budget, and the overall aesthetic of your coop. Ensure the frame material is treated to resist moisture and withstand the rigors of outdoor conditions. (chicken-coop-window-materials.webp)
Window Panes

Window panes can be made of glass or plastic. Glass provides excellent clarity and durability but can be prone to breakage. Tempered glass is a safer option, as it breaks into small, blunt pieces. Plastic panes, such as acrylic or polycarbonate, are lightweight, shatter-resistant, and offer good insulation. However, they can scratch more easily. Consider using a UV-resistant material to protect your chickens from harmful sun rays. The choice depends on your priorities; glass for clarity and aesthetics, or plastic for safety and durability.
Window Sizing Guide
Window size depends on coop size, the number of chickens, and ventilation requirements. As a general guideline, aim for a window area that is at least 10% of the floor area of the coop for proper ventilation. Ensure that windows are placed high enough to prevent drafts. Consider the overall design of your coop and the placement of other ventilation features when determining window size. A well-sized window ensures sufficient airflow while maintaining a comfortable and secure environment for your chickens.
Window Installation Step-by-Step
Installing windows involves several steps, including preparing the opening, installing the frame, securing the window pane, and weatherproofing. Precise measurements and careful execution are crucial to ensure a secure, weather-tight seal. Follow the manufacturer’s instructions for the specific window type you have chosen. If you are not comfortable with this process, consider hiring a professional to ensure the windows are correctly installed and provide optimal performance. A well-installed window will improve the coop’s energy efficiency and protect your chickens from the elements.
Preparing the Coop Opening

Before installing the window, prepare the opening in the coop wall. Measure the opening accurately and ensure it is square. Remove any existing siding or framing that will interfere with the window installation. Check the framing for any rot or damage and repair it as needed. Ensure the opening is the correct size for the window frame, allowing for a snug fit. Accurate preparation ensures a stable base for the window, which contributes to its overall performance and longevity. (chicken-coop-window-installation.webp)
Installing the Frame
Place the window frame into the prepared opening, ensuring it is level and plumb. Use shims to level the frame if needed. Secure the frame to the coop framing using screws, nails, or other fasteners recommended by the manufacturer. Ensure the frame is flush with the exterior siding. Pay close attention to the corners, making sure they are square. Properly installed window frames are essential for a tight seal and will prevent water and air leaks. Double-check all measurements before securing the frame to ensure proper alignment.
Securing the Window Pane
Carefully insert the window pane into the frame. Secure the pane using glazing points, putty, or other methods recommended by the manufacturer. Make sure the pane is centered and fits snugly within the frame. Avoid applying excessive pressure that could crack the glass or damage the frame. Proper securing of the window pane is crucial for preventing leaks and drafts. Make sure that all glazing materials are appropriate for outdoor use and will withstand the elements.
Weatherproofing and Sealing

Apply weatherstripping around the window frame to create a tight seal and prevent air and water leaks. Use caulk to seal any gaps between the frame and the coop siding. Ensure all seals are waterproof and weatherproof. Pay special attention to the corners and edges of the frame. Properly weatherproofing your windows will improve the coop’s energy efficiency, protect your chickens from the elements, and extend the life of the window. Regular inspections and maintenance of the seals are important.
Ensuring Safety and Security
Ensuring the safety and security of your chickens is of utmost importance. Windows can be a potential entry point for predators if not properly secured. Employing predator-proofing measures and safety precautions can prevent attacks and ensure your flock’s well-being. Combine the right window type, installation practices, and preventative measures to provide your chickens with a safe, comfortable, and secure living environment. Remember, prevention is key to protecting your flock. (predator-proof-chicken-coop.webp)
Predator-proofing
Install hardware cloth or wire mesh over the windows to prevent predators from entering. The mesh should be securely attached to the frame and have a small enough gauge to deter predators. Ensure there are no gaps or weak points where predators could gain access. Use heavy-duty screws or staples to attach the mesh. Check the mesh regularly for any damage or signs of tampering. Consider using multiple layers of protection for added security. Properly secured windows can help prevent attacks from various predators.
Keeping Chickens Safe

Use tempered glass or shatter-resistant plastic panes to minimize the risk of injury if the window breaks. Avoid placing windows too low to the ground where predators could reach the chickens. Ensure that all moving parts of opening windows are easy to operate and safe for chickens. Regular inspections of your windows and the surrounding areas for any signs of damage or potential hazards can improve the safety of your coop. Your chickens’ health and safety depend on secure and well-maintained windows.
Window Maintenance and Cleaning
Regular maintenance and cleaning of your chicken coop windows are vital for preserving their functionality, appearance, and the overall health of your chickens. Regular inspections, proper cleaning methods, and the prompt addressing of any issues will contribute to the longevity of the windows and ensure they continue to serve their purpose effectively. A clean and well-maintained coop is a healthy coop. (chicken-coop-window-maintenance.webp)
Regular Inspections
Inspect your windows regularly for any signs of damage, such as cracks, leaks, or loose seals. Check the hardware cloth or mesh for any holes or damage. Look for any signs of rot or deterioration in the frame. Inspect the caulk and weatherstripping for any gaps or cracks. Promptly address any issues to prevent further damage or compromise the coop’s security. Regular inspections can catch problems early and save you from more significant repairs down the road. The frequency of inspections depends on your climate and the materials used in your windows; however, monthly or quarterly inspections are recommended.
Cleaning Procedures
Clean your windows regularly to remove dirt, dust, and other debris. Use a mild soap and water solution to clean the glass or plastic panes. Avoid harsh chemicals or abrasive cleaners that could damage the windows. Clean the frames and any hardware as needed. Ensure that all cleaning solutions are non-toxic and safe for your chickens. Regular cleaning maintains the appearance of the windows and allows the maximum amount of light to enter the coop.
Troubleshooting Common Issues
Even with the best installation and maintenance, you may encounter some issues with your chicken coop windows. Identifying and addressing these issues promptly can prevent more significant problems. From drafts and leaks to condensation and damage, the following troubleshooting tips will help you maintain the integrity of your coop’s windows and provide the best possible environment for your chickens. Quick action will extend the windows’ life and effectiveness.
If you experience drafts or leaks around your windows, check the weatherstripping and caulk for damage. Replace any damaged weatherstripping or re-caulk the gaps. If condensation is forming on the inside of your windows, increase the ventilation in the coop. Consider adding vents or opening windows to improve airflow. If a window pane is broken, replace it immediately. For other damage or issues, consult a professional or window installation guide.
In conclusion, installing and maintaining windows in your chicken coop is a vital aspect of providing a comfortable and secure environment for your flock. By planning carefully, choosing the right window types, and following installation and maintenance guidelines, you can ensure that your chickens receive adequate ventilation, natural light, and protection from the elements. Prioritizing the health and well-being of your chickens through diligent window care will result in a thriving flock and a rewarding experience for you. Remember that investing in the safety and comfort of your chickens through well-maintained windows is an investment in their productivity and happiness.