Building your own DIY chicken coop can be a rewarding project, offering fresh eggs and the satisfaction of creating a safe haven for your feathered friends. This guide will walk you through the 5 simple steps to construct a functional and attractive chicken coop, making the process manageable even for beginners. With careful planning and execution, you can provide a comfortable home for your chickens and enjoy the benefits of backyard poultry keeping. Remember, the key to a successful DIY chicken coop is to take your time, follow instructions carefully, and prioritize the safety and well-being of your chickens. This guide focuses on the practical aspects of building the coop, ensuring it is both functional and aesthetically pleasing.
Planning Your DIY Chicken Coop
Before you even pick up a hammer, careful planning is crucial for a successful DIY chicken coop project. This phase involves considering several factors to ensure your coop meets your needs and complies with local regulations. Proper planning not only simplifies the build process but also ensures the coop is a safe, comfortable, and sustainable environment for your chickens. Taking the time to plan will save you headaches and costs in the long run. A well-thought-out plan will also help you estimate materials, manage your budget, and create a timeline for completion. Don’t rush this phase, as the success of your entire project depends on it.
Choosing the Right Location
The location of your chicken coop is one of the most important decisions you’ll make. Choose a spot that provides adequate sunlight and shade, offering protection from extreme weather conditions. Consider the proximity to your house for ease of access for daily chores. Ensure the area is well-drained to prevent water buildup, which can lead to health issues for your chickens. Furthermore, consider the prevailing winds and potential noise complaints from neighbors. A location that is relatively level will also make construction easier. Think about how the coop will integrate into your existing landscape and garden to ensure a harmonious setting.
Considering Local Regulations

Before you start building, check your local ordinances and homeowner association rules regarding chicken keeping. Regulations vary widely, covering aspects such as the number of chickens allowed, coop size, setbacks from property lines, and permitted coop designs. Obtain any necessary permits and understand the specific requirements for your area. Failure to comply can result in fines or, worse, being forced to remove your coop. Visiting your local government’s website or contacting the planning department is a good starting point for gathering this information. Understanding and complying with all local regulations ensures a smooth and legal project.
Selecting the Best Materials
The choice of materials significantly impacts the longevity, safety, and aesthetics of your DIY chicken coop. Opt for durable, weather-resistant materials that can withstand the elements and resist wear and tear. Consider your budget and the overall design of your coop when selecting materials. Using high-quality materials initially can save you money and effort in the long run by reducing the need for frequent repairs and replacements. Think about the lifespan of the coop and choose materials that will last. The selection of materials also influences the overall maintenance requirements of the coop.
Wood Types and Durability
Wood is a common choice for chicken coops, but not all woods are created equal. Pressure-treated lumber is a good option for its resistance to rot and pests, especially for the foundation and ground contact areas. Cedar and redwood are naturally rot-resistant and offer an attractive appearance, making them suitable for the exterior of the coop. Avoid using wood that has been treated with harmful chemicals that could be toxic to your chickens. Pine is a more affordable option, but it may require more maintenance and treatment to ensure its longevity. Evaluate the wood’s durability, cost, and suitability for your climate when making your choice.
Essential Tools for Construction

Having the right tools is essential for a smooth and efficient DIY chicken coop build. Ensure you have the necessary tools before you begin, including a saw (circular saw or hand saw), a drill, a level, a measuring tape, a hammer, a screwdriver, and safety glasses. Other useful tools include a staple gun for attaching wire mesh, a square to ensure accurate angles, and clamps to hold materials in place while assembling. Having these tools readily available will expedite the construction process and reduce the chance of frustration. Consider renting any specialty tools you may not own to save costs. Safety glasses, gloves, and a dust mask are vital for protection.
Building Your DIY Chicken Coop
With planning and preparation complete, it’s time to start building your chicken coop. Follow the steps carefully and take your time to ensure the coop is structurally sound and safe. This stage of the project is where your vision comes to life, providing a comfortable and secure home for your chickens. Remember that precise measurements and secure connections are crucial for the coop’s overall integrity. This phase will test your skills and patience, so it is important to remain focused.
Step 1 Preparing the Foundation
Start by preparing the foundation for your coop. This step ensures the structure is level and stable. If you’re building directly on the ground, consider using a gravel base to improve drainage and prevent moisture buildup. For a more permanent foundation, you can construct a concrete slab or use treated wood skids. Ensure the foundation is square and level, using a level to check your progress. A well-prepared foundation prevents the coop from shifting or settling over time. This initial step is crucial for the long-term stability of your chicken coop.
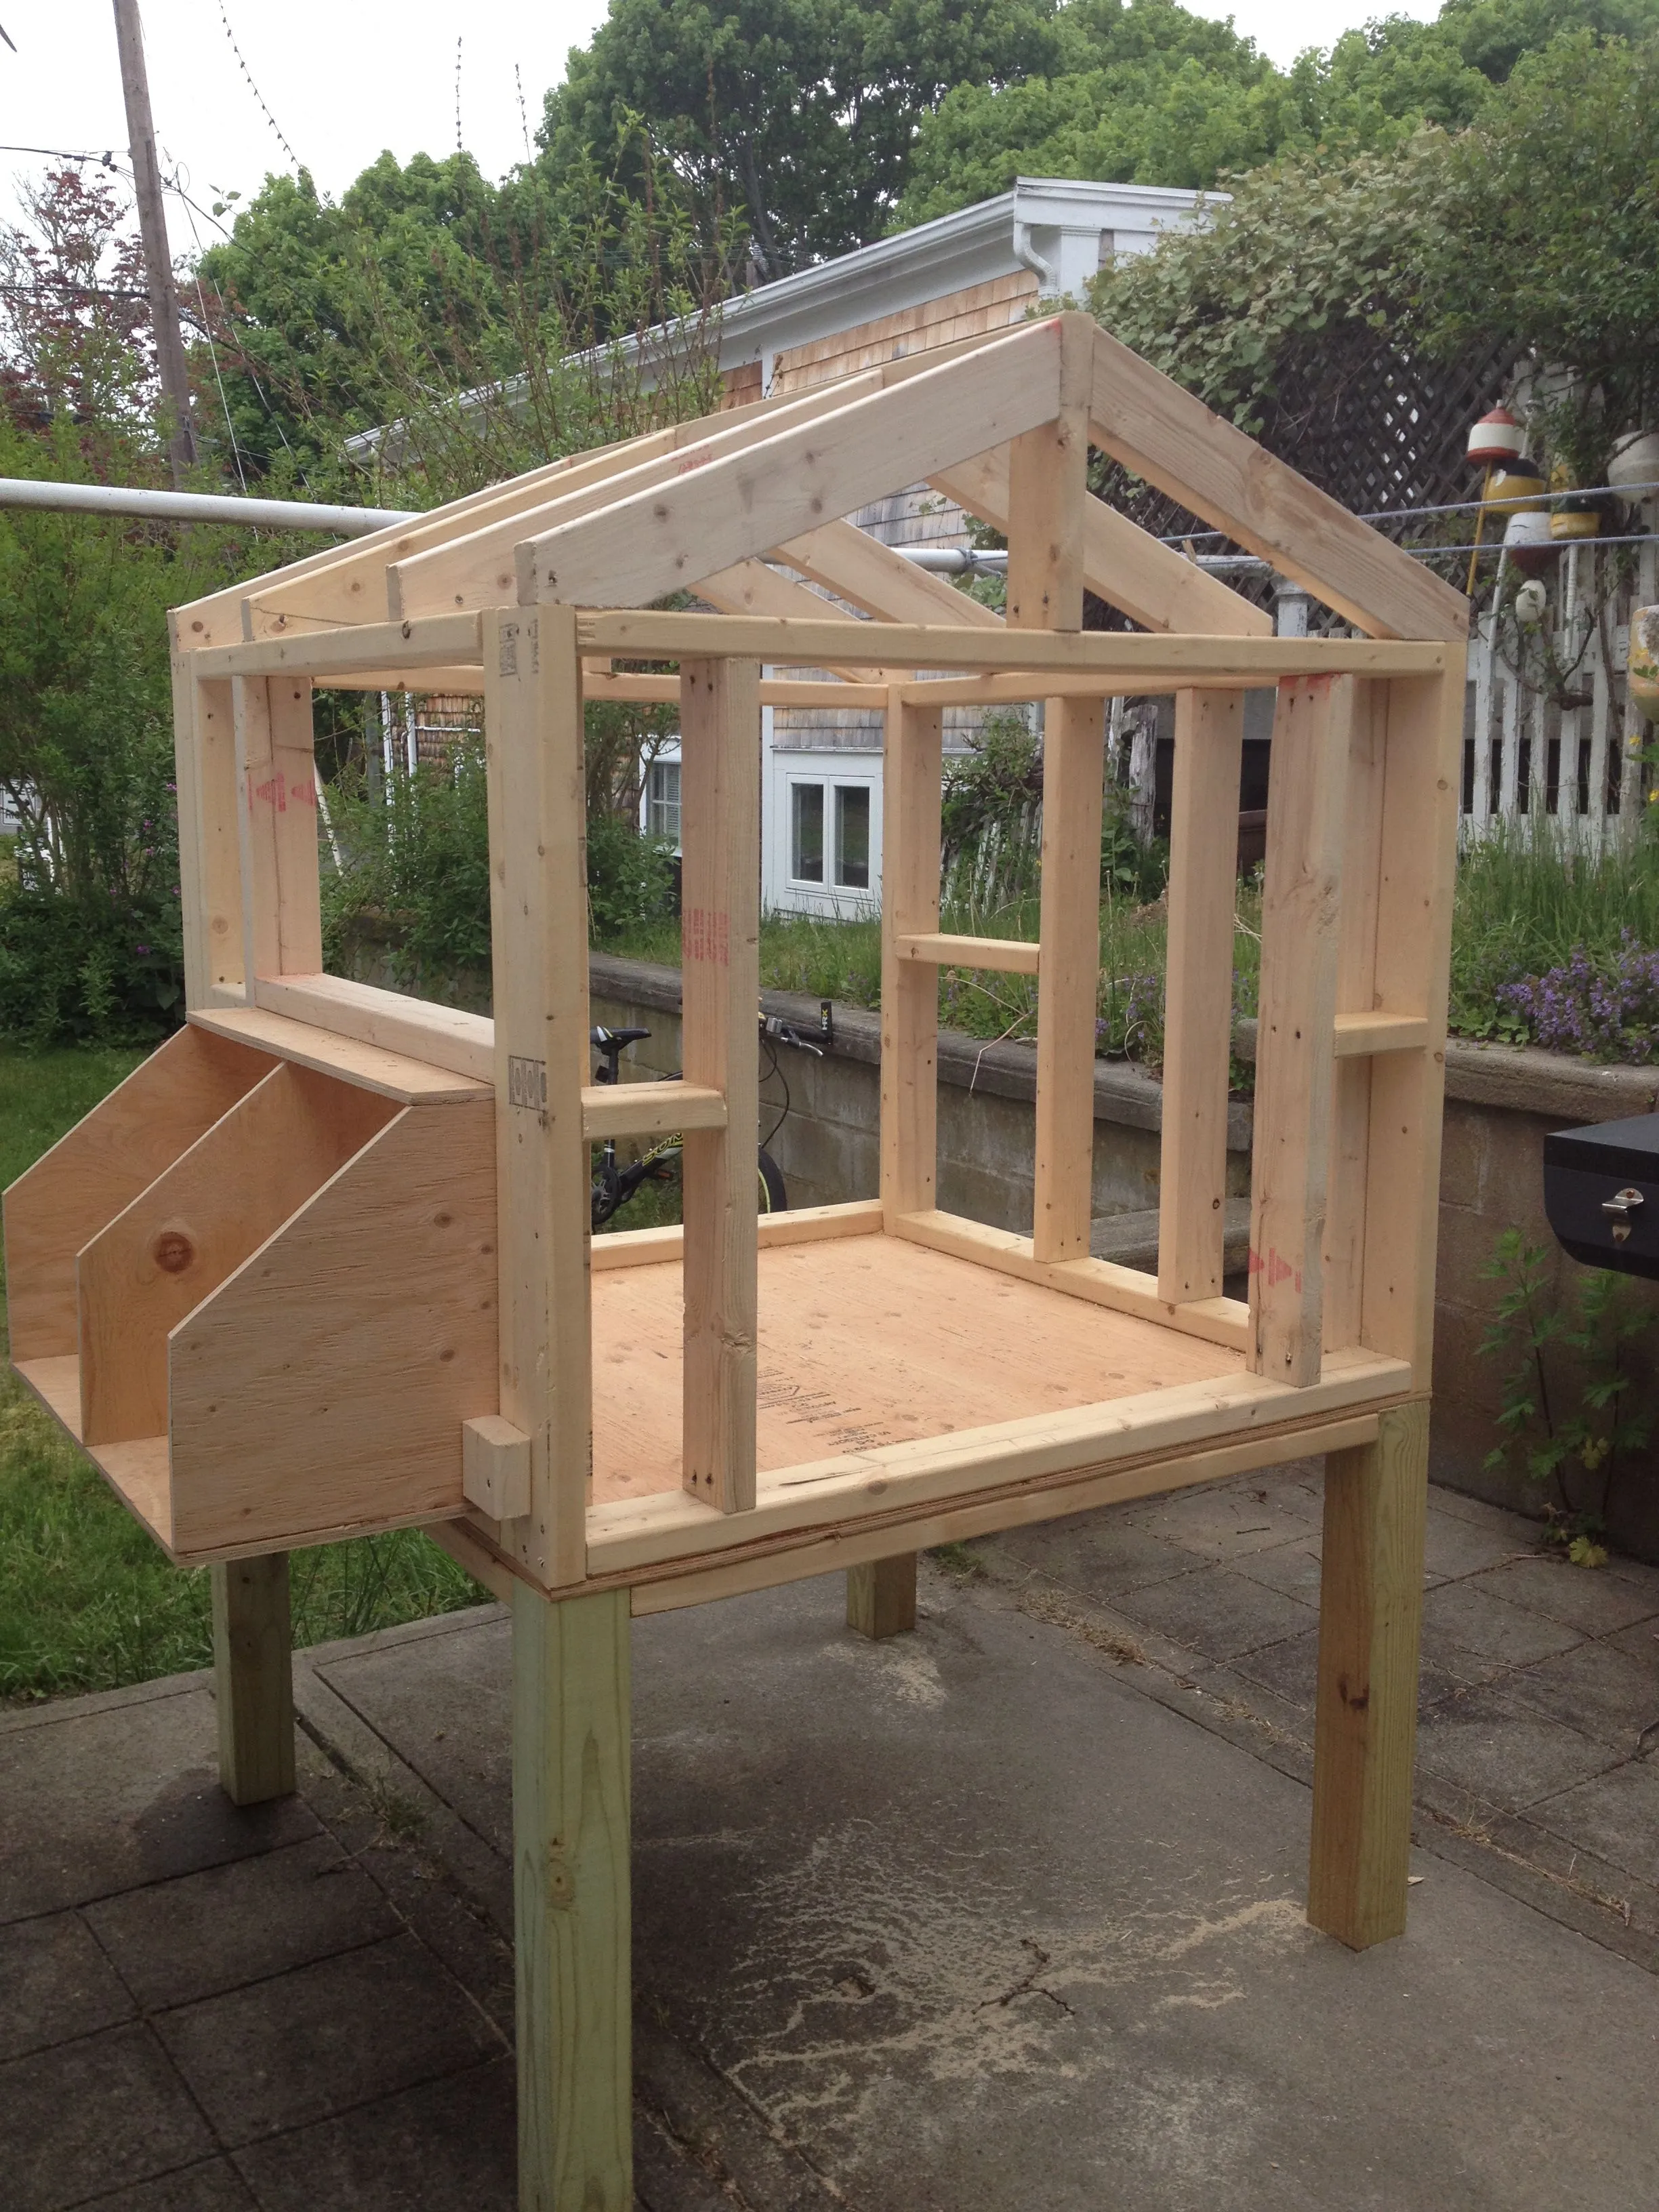
Step 2 Constructing the Frame

Next, build the frame of your chicken coop. This involves assembling the walls, floor, and roof supports, often using a 2x4 or 2x6 lumber. Follow your plans carefully, cutting the wood to the required lengths and attaching the pieces with screws or nails. Ensure the frame is square and level as you go. Proper framing provides the structural support for the entire coop, so accuracy is paramount. Regularly check the frame’s dimensions against your plans. A solid frame is essential for the safety of your chickens and the overall longevity of the coop.
Step 3 Adding Walls and Roofing
Once the frame is complete, attach the walls and roofing. Use plywood, siding, or other suitable materials for the walls, ensuring they are securely fastened to the frame. For the roof, consider using materials such as asphalt shingles, metal sheets, or corrugated plastic, depending on your budget and preference. Ensure the roof is waterproof to protect your chickens from the elements. Proper installation of the walls and roofing is essential for weather protection, insulation, and the overall aesthetics of your coop. Pay attention to overlapping the roofing materials to prevent water leaks. This is a critical stage of construction to ensure the coop is weatherproof.
Step 4 Building Doors and Windows
Install doors and windows to provide access and ventilation. The door should be sturdy and secure, with a latch that is difficult for predators to open. Windows are essential for natural light and airflow, which can be covered with wire mesh for protection and ventilation. Ensure the windows are positioned to maximize light and minimize drafts. Building doors and windows requires precision to ensure they fit correctly and function smoothly. Provide a secure closure for the doors to protect the chickens from predators. Proper placement of doors and windows contributes to the comfort and safety of your flock.
Step 5 Installing Hardware and Accessories

Add the finishing touches by installing essential hardware and accessories. This includes nesting boxes for egg-laying, roosting bars for sleeping, and feeders and waterers for feeding and hydration. Secure the hardware with screws or nails, and ensure everything is firmly attached. Adding hardware and accessories completes the functionality of your chicken coop. The design should support the chickens’ daily life. Choose materials and placement that make cleaning and maintenance straightforward. Providing these essential elements will promote the well-being of your chickens and make the coop a pleasant place for them.
Finishing Touches and Safety
After the basic construction is complete, focus on the finishing touches and safety measures to ensure the coop is secure, comfortable, and predator-proof. Proper ventilation and predator protection are essential for the health and safety of your chickens. Attention to these details demonstrates your care for your chickens’ well-being. These final touches enhance the overall functionality and aesthetic appeal of the coop, providing a secure and pleasant environment for your flock.
Ventilation and Airflow
Ensure proper ventilation by installing vents or windows that can be opened and closed. Good airflow prevents the buildup of ammonia from chicken droppings, which can cause respiratory problems. Proper ventilation also helps regulate the temperature inside the coop, keeping it cool in summer and preventing moisture buildup in winter. Position vents strategically to allow fresh air to circulate while avoiding drafts. Proper ventilation is crucial for maintaining a healthy environment for your chickens. Consider adding a ridge vent or a cupola to promote airflow.
Predator-Proofing Your Coop

Protect your chickens from predators by using secure latches on doors and windows, and by burying hardware cloth or wire mesh around the perimeter of the coop to prevent digging. Use heavy-duty wire mesh for the walls and roof. Ensure there are no gaps or openings that predators can exploit. Predator-proofing is crucial for the safety of your chickens, as predators such as foxes, raccoons, and hawks can cause significant harm. Regularly inspect the coop for any signs of damage or potential entry points. Using secure latches and materials can minimize the risk of predation.
Maintaining Your DIY Chicken Coop
Regular maintenance is essential to keep your chicken coop in good condition and to ensure the health and happiness of your chickens. Cleaning, sanitation, and regular inspections are crucial for preventing disease and maintaining a hygienic environment. Routine maintenance will extend the life of your coop and provide a safe and comfortable home for your flock. Consistency in your maintenance routine is key to preventing problems before they arise. A well-maintained coop also enhances the value and aesthetics of your property.
Cleaning and Sanitation
Clean the coop regularly by removing droppings, soiled bedding, and any spilled food or water. Use a safe, pet-friendly disinfectant to sanitize the coop thoroughly. Regular cleaning prevents the buildup of bacteria, parasites, and foul odors. A clean coop promotes the health of your chickens and reduces the risk of disease. Aim to clean the coop at least once a week, or more frequently depending on the size of your flock and the coop’s design. Provide fresh, clean bedding materials such as straw, wood shavings, or sand.
Regular Inspections and Repairs

Inspect your chicken coop regularly for any signs of damage or wear and tear. Check the structure for loose boards, broken latches, or damaged wire mesh. Repair any issues promptly to prevent further problems. Inspect the coop for signs of pests, such as mites or rodents, and take appropriate action if necessary. Routine inspections and timely repairs extend the lifespan of your coop and prevent small problems from escalating into larger, more costly repairs. Regularly check for leaks, and address any issues immediately to protect your chickens and the coop’s structure.
Building a DIY chicken coop is a fulfilling project that offers numerous benefits, from fresh eggs to a closer connection with nature. By following these 5 simple steps, you can create a safe, comfortable, and attractive home for your chickens. Remember to prioritize planning, use quality materials, and regularly maintain your coop to ensure its longevity and the well-being of your flock. With dedication and attention to detail, you’ll enjoy the rewards of backyard chicken keeping for years to come. Happy building, and enjoy the fruits of your labor!