Building a DIY chicken coop is a rewarding project that offers numerous benefits, from providing fresh eggs to enriching your backyard. This ultimate guide is designed to walk you through every step, from initial planning to final maintenance, ensuring you create a safe, comfortable, and stylish home for your feathered friends. Whether you’re a seasoned DIY enthusiast or a beginner, the right planning and preparation can make the process enjoyable and produce a coop that will last for years. We’ll cover everything you need to know to get started, so grab your tools and let’s get building!
Planning Your DIY Chicken Coop
Before you hammer the first nail, a solid plan is essential. Consider the number of chickens you plan to keep, as this will dictate the coop’s size. A general rule is to provide at least 4 square feet of floor space per chicken inside the coop and 8-10 square feet in the run. Local ordinances and homeowner association (HOA) rules can also impact your design, so research these early. Think about the available space in your yard, sunlight exposure, and ease of access for cleaning and maintenance. Drawing up a detailed plan, including a materials list and budget, will save you time and money in the long run. A well-thought-out plan ensures your coop meets the needs of your flock and your lifestyle, setting you up for success.
Choosing the Right Location
The location of your chicken coop is crucial for the health and happiness of your birds. Choose a spot that offers a balance of sun and shade, allowing chickens to regulate their body temperature. Ensure the area is well-drained to prevent water from pooling, which can lead to health issues. Consider the prevailing winds and avoid placing the coop in a low-lying area prone to flooding. Proximity to your house is also a factor; while you want easy access for care, you also need to consider potential noise and odor. Evaluate the security of the site against predators, and whether it is easily accessible for cleaning and maintenance. Careful site selection will contribute significantly to the longevity and functionality of your coop.
Sun Exposure and Ventilation

Proper ventilation is essential for maintaining a healthy environment within your coop. Good ventilation helps to remove ammonia buildup from chicken waste, excess moisture, and stale air, which can lead to respiratory illnesses. Ensure your coop has vents high up near the roof, allowing warm, moist air to escape. Avoid placing vents directly over roosting bars, as this can cause drafts. The coop should also have some shaded areas to protect chickens from excessive heat during the summer. Consider the sun’s path throughout the day to determine the best placement of windows and vents to maximize airflow while minimizing direct sunlight exposure during peak heat hours. This balance is vital for the health and well-being of your flock.
Predator-Proofing Your Coop
Protecting your chickens from predators is paramount. Use hardware cloth instead of chicken wire for the run, as hardware cloth is much more resistant to digging and chewing. Bury the hardware cloth around the perimeter of the run at least 12 inches deep, extending it outwards to prevent digging under. Secure all doors and windows with sturdy latches and consider using predator-resistant locks. Ensure the roof of the run is also secure. Regularly inspect your coop for any signs of weakness or potential entry points. Common predators include foxes, raccoons, dogs, and birds of prey. Implementing robust predator-proofing measures provides peace of mind and keeps your chickens safe.
Materials and Tools You’ll Need
Gathering the right materials and tools is essential for a smooth building process. The materials you need will vary based on your chosen coop design, but certain items are universal. Planning ahead and creating a detailed list will prevent unnecessary trips to the hardware store. Always prioritize quality materials, particularly for the frame and predator-proofing elements. The tools required may include basic carpentry tools such as a saw, drill, hammer, and level, to more specialized equipment, such as a nail gun or circular saw, depending on the complexity of the coop. Safety gear, including eye protection and gloves, should always be a priority.
Essential Materials for Your Coop

Your material list should include lumber for the frame, exterior siding, roofing materials, and hardware cloth for the run. Choose rot-resistant wood like cedar or pressure-treated lumber for the framing. Select roofing materials appropriate for your climate, such as asphalt shingles or corrugated metal. Use sturdy hardware cloth, with a mesh size appropriate to keep out predators. Consider purchasing pre-made nesting boxes and roosting bars to save time. Other essential items include screws, nails, hinges, latches, and any paint or sealant you choose to protect the wood. Make sure to account for all the small components, like door handles and window fasteners, to avoid delays during construction.
Tools for Building Your Coop
A basic set of tools can get you far in building a chicken coop. You’ll need a saw (circular, hand, or reciprocating), a drill with various drill bits, a hammer, and a level to ensure everything is plumb. A measuring tape is a must-have for accurate cuts. A nail gun can speed up construction significantly, while a screwdriver set will be handy for installing screws. Safety glasses and gloves are non-negotiable. Depending on your chosen design and materials, you might require specialty tools such as a miter saw, or a jigsaw for intricate cuts. Consider borrowing tools or renting them if you don’t plan to use them frequently.
Top DIY Chicken Coop Designs
There are numerous DIY chicken coop designs to choose from, each offering unique features and benefits. The best design for you will depend on factors such as your available space, your budget, and the number of chickens you plan to keep. Consider the level of complexity, the materials needed, and the overall aesthetics. Some designs are simple and easy to construct, while others are more elaborate, offering additional features like built-in runs or integrated storage. Take the time to research different options and choose a design that aligns with your skills and requirements.
The Basic Chicken Coop

The basic coop is a simple, rectangular structure, ideal for beginners. It typically features a wooden frame, walls, a roof, and a door. The design is straightforward and allows for easy modifications. You can customize the size, add windows for ventilation, and incorporate nesting boxes and roosting bars. This coop type often features a simple sloped roof, making it easy to shed rain and snow. This design is best suited for smaller flocks or as a starting point for learning about coop construction. It’s cost-effective and relatively quick to build.
The A-Frame Coop
The A-frame coop, shaped like the letter ‘A’, is a portable option that’s both stylish and practical. The slanted walls make it easy to shed rain and snow, and the design offers good structural integrity. A-frame coops are often made with lightweight materials, making them easy to move around the yard, allowing you to give your chickens fresh foraging areas. The portability is a great advantage but it will require planning for sufficient predator proofing. This coop style is especially good for small flocks and backyards where space is at a premium.
The Walk-In Coop
A walk-in coop offers ample space and ease of access for both you and your chickens. These coops are large enough to allow you to enter and stand up inside for cleaning and maintenance. These coops typically feature a separate enclosed run, providing a safe outdoor space. Walk-in coops can be customized with various features, such as storage areas, automatic doors, and even integrated gardening space. Although more complex to build, walk-in coops are very functional and can accommodate larger flocks.
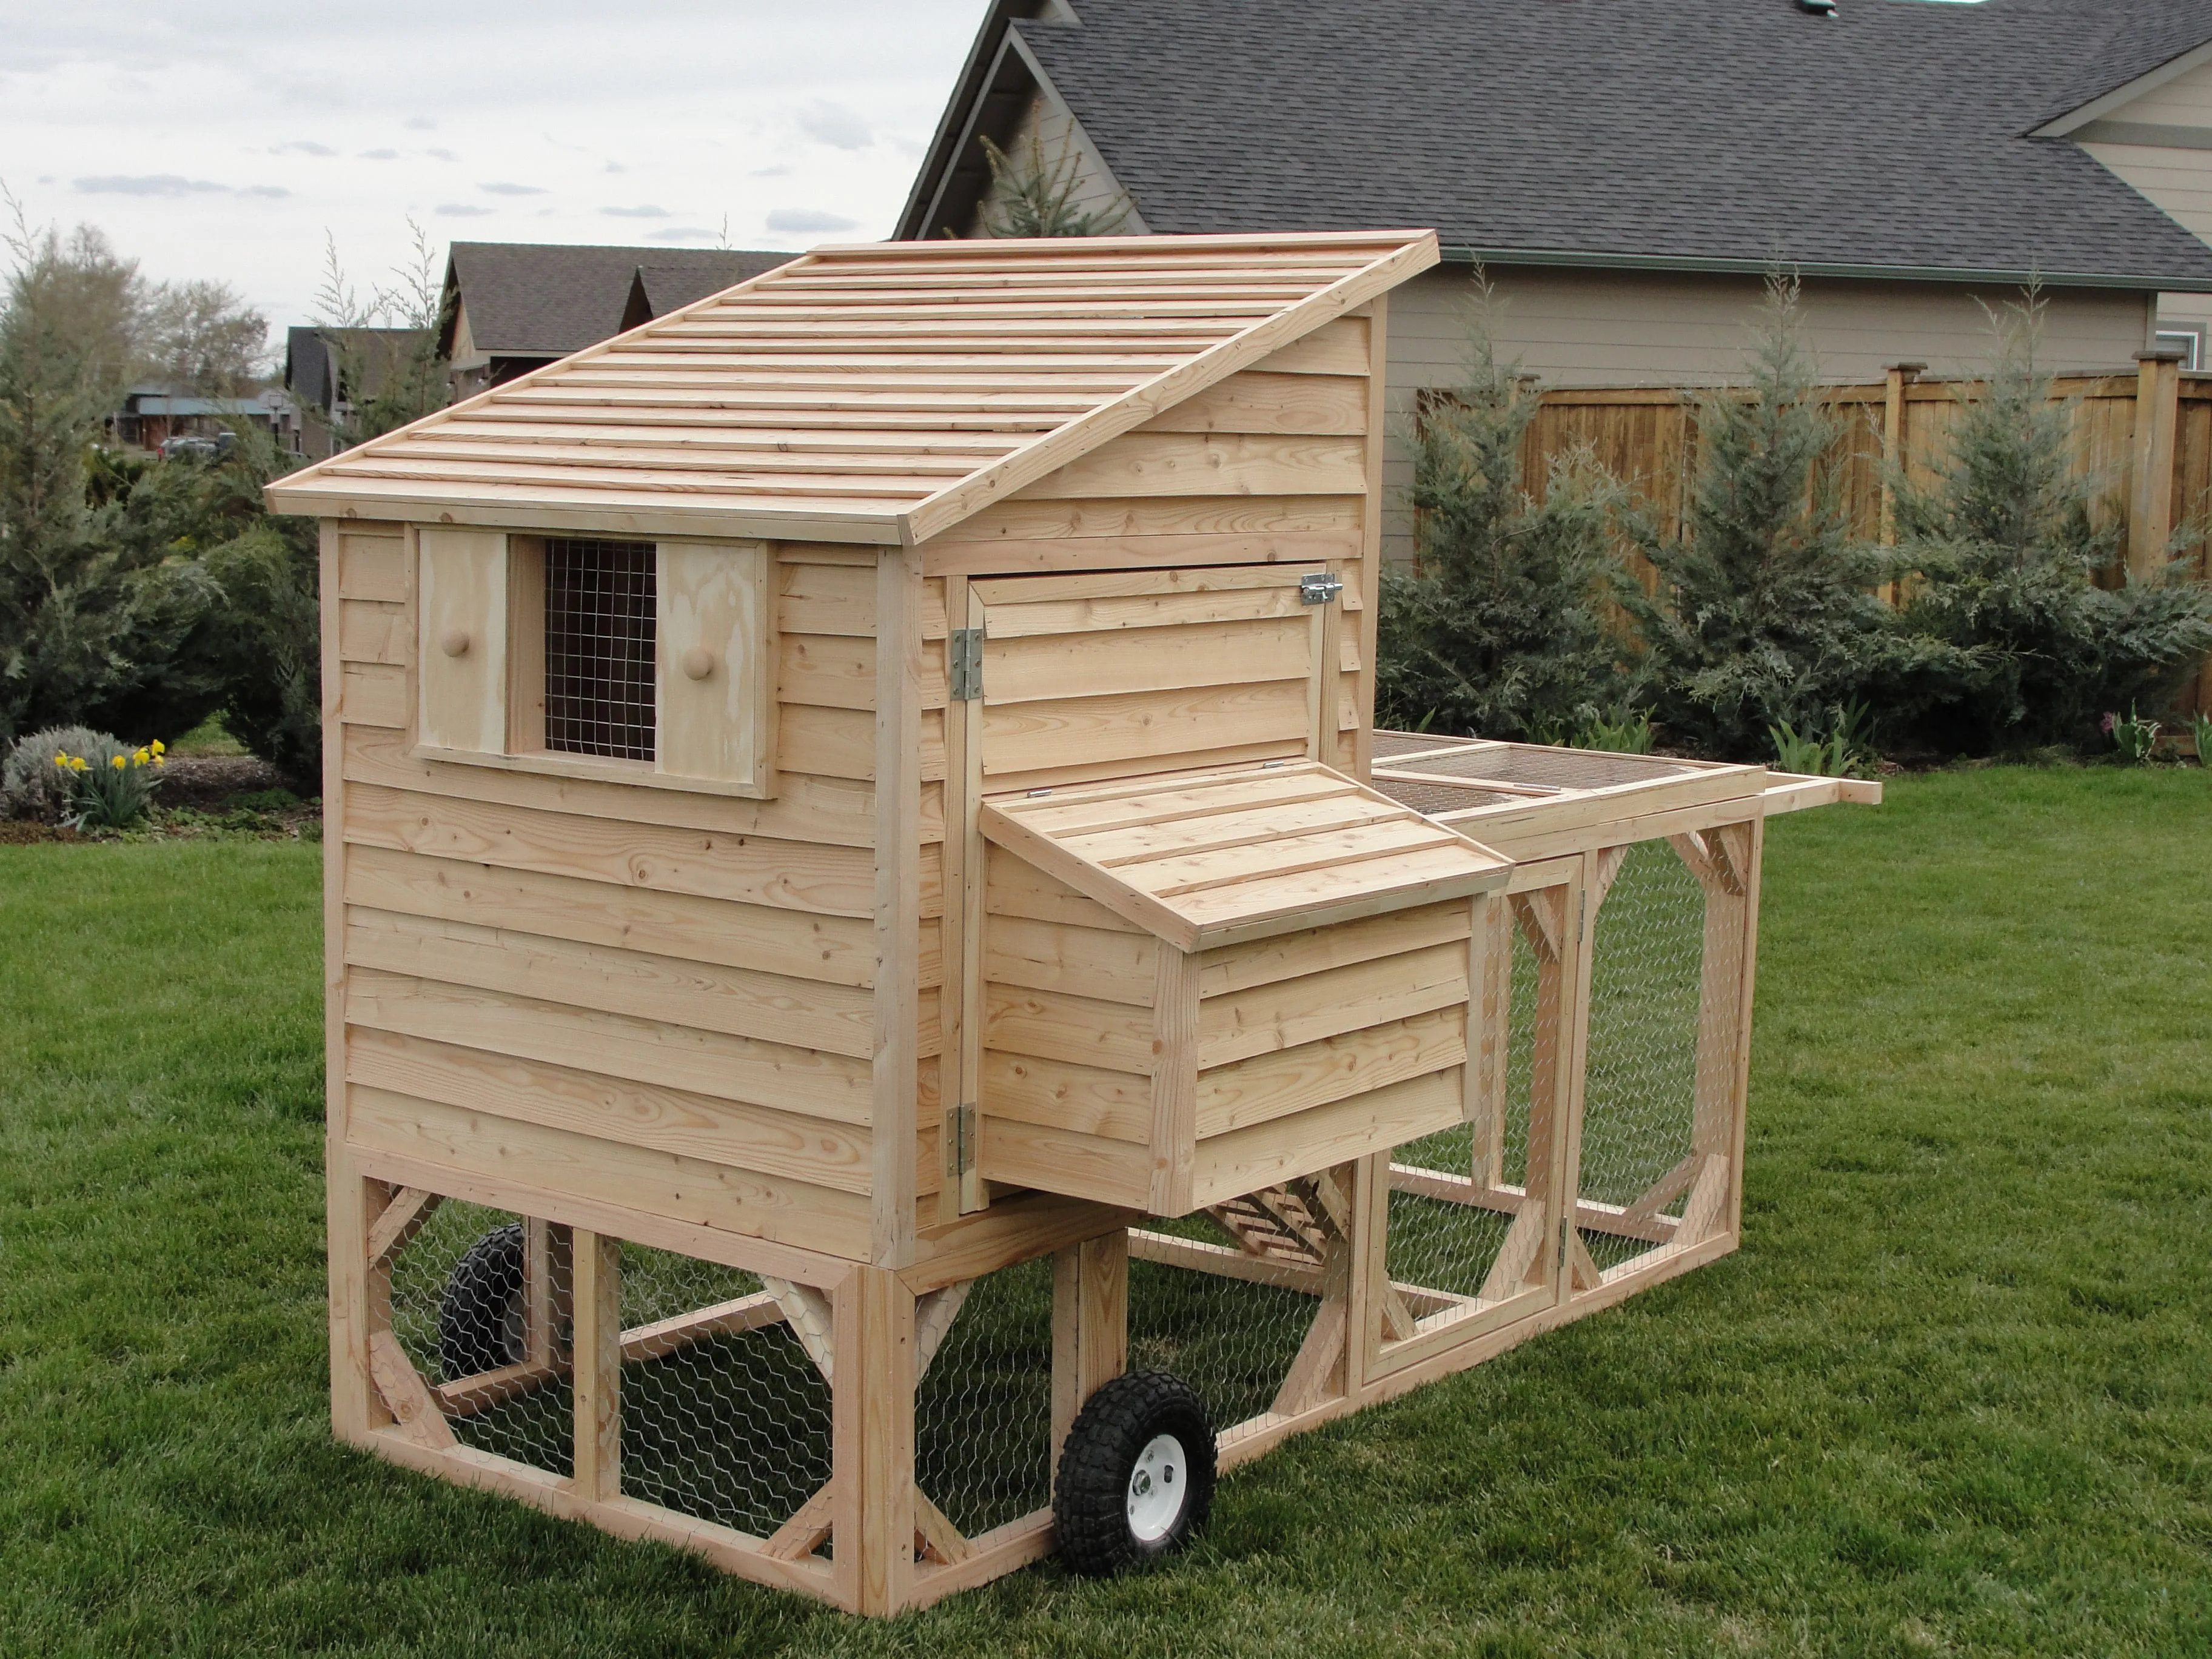
The Mobile Chicken Coop

Mobile chicken coops, also known as chicken tractors, are designed to be easily moved around your yard. This allows your chickens to graze on fresh grass and access new areas for foraging. Mobile coops are often smaller and lighter in construction, with wheels or skids for easy transport. This design allows you to distribute chicken manure evenly across your lawn, contributing to soil fertility. However, mobile coops require consistent movement to prevent the chickens from damaging specific areas of the yard. The mobility gives these coops the added benefit of moving them to a safer area during times of increased predator activity.
Building the Coop Step-by-Step
Building a chicken coop is a rewarding project that requires careful planning and execution. Following these steps will guide you through the process, from preparing the foundation to adding the finishing touches. Safety is paramount throughout the entire process, so always wear appropriate protective gear. Ensure you have all the necessary tools and materials before starting each stage, and don’t be afraid to seek help if you are unsure about a particular step. Taking your time and adhering to your plan will result in a successful build.
Preparing the Foundation
A solid foundation is essential for the longevity and stability of your chicken coop. The type of foundation you choose depends on your soil conditions and the design of your coop. For small coops, you can often get away with a simple gravel base or a concrete slab. Ensure the area is level and compacted before pouring concrete or spreading gravel. Consider incorporating a gravel perimeter around the base to improve drainage and deter pests. For larger coops, a more robust foundation may be required. A proper foundation prevents sinking and ensures the coop remains level over time. Proper drainage is key to preventing moisture damage.
Constructing the Coop Frame

The frame provides the structural support for your coop. Use pre-cut lumber or cut your own according to your plans. Assemble the frame, ensuring that all corners are square and all measurements are accurate. Secure the frame components using screws or nails, ensuring the joints are strong and stable. Once the frame is complete, double-check your measurements and make any necessary adjustments. A well-built frame is critical, as it supports the walls, roof, and other components. Make sure to regularly check that all angles are correct. Add cross bracing to add rigidity and stability to the frame.
Adding Walls, Roof, and Doors
Once the frame is erected, you can start adding the walls, roof, and doors. Attach the exterior siding to the frame, overlapping the edges to provide weather protection. Install the roofing materials according to the manufacturer’s instructions, ensuring proper overlapping and sealing. Build and install the doors, making sure they fit well and are secure. Consider adding windows to your coop for natural light and ventilation, which should be secure and accessible for cleaning. Careful attention to these components will help protect the chickens from the elements and provide a safe, enclosed space. Make sure to seal all gaps to keep out drafts and pests.
Creating a Comfortable Interior
A comfortable interior is essential for the health and well-being of your chickens. This includes providing adequate space, proper ventilation, and appropriate features. Your interior should be designed with your chickens’ needs in mind. By incorporating the correct design, you can ensure they have a comfortable and safe place to rest and thrive. A well-designed interior makes cleaning and maintenance much easier. Proper planning leads to a happier, healthier flock.
Nesting Boxes and Roosts

Nesting boxes provide a private and safe space for hens to lay their eggs. Position the nesting boxes in a quiet, shaded area of the coop, away from the roosting bars. Provide one nesting box for every 3-4 hens. Ensure the boxes are easily accessible for egg collection. Roosting bars give chickens a place to sleep. Place roosting bars at a comfortable height, allowing chickens to hop up easily. Provide 8-10 inches of roosting space per chicken. Consider the placement of the roosting bars relative to the nesting boxes to prevent droppings from contaminating the eggs. Proper placement and design will contribute to a clean, comfortable, and functional coop.
Ventilation and Lighting
Proper ventilation prevents the buildup of moisture and ammonia, which can lead to respiratory problems in chickens. Install vents high up near the roof to allow for air circulation. Ensure the vents are protected from the weather. Natural lighting is also essential. Provide windows or openings to allow sunlight to enter the coop during the day. Chickens need about 14-16 hours of daylight for optimal egg production. Consider adding supplemental lighting, especially during the winter months, to maintain consistent egg production. Be sure that all electrical wiring is done to code, and use appropriate fixtures and bulbs.
Finishing Touches & Enhancements
Once the main structure is complete, you can add finishing touches to enhance the functionality and aesthetics of your coop. Adding these elements helps to create a more appealing and practical space for your chickens. From painting and weatherproofing to adding runs, consider the details that will improve the overall experience for both you and your flock. These additions will also contribute to the longevity and enjoyment of your coop.
Painting and Weatherproofing

Painting your coop not only enhances its appearance but also protects the wood from the elements. Choose a non-toxic, weather-resistant paint specifically designed for outdoor use. Apply the paint evenly and allow it to dry completely before introducing chickens. Seal any gaps or cracks to prevent drafts and moisture from entering the coop. Weatherproofing measures include applying sealant to seams, using weather-resistant roofing materials, and ensuring proper drainage around the foundation. These measures extend the life of your coop and protect your chickens.
Adding a Run and Outdoor Space
An outdoor run provides a safe and secure space for chickens to roam and forage. Attach hardware cloth to a wooden frame to create the run, ensuring it’s securely anchored to the ground and roofed to protect against predators. Provide access to the run through a door from the coop. Include features like perches, dust bathing areas, and shade structures within the run. Consider adding a separate area for compost or food scraps. Providing ample space for your chickens to exercise and explore leads to healthier and happier birds. The run allows chickens to enjoy the outdoors without the risks of predators.
Maintaining Your DIY Chicken Coop
Regular maintenance is crucial for keeping your chicken coop in good condition and ensuring the health of your flock. This includes regular cleaning, seasonal adjustments, and addressing any potential problems. Proper maintenance extends the life of your coop, prevents the buildup of diseases, and ensures that your chickens live in a safe and comfortable environment. A consistent maintenance schedule keeps your coop in top condition and will give you years of service.
Cleaning and Upkeep
Clean your coop regularly to remove droppings, spilled food, and other debris. A weekly cleaning schedule is recommended. Remove soiled bedding and replace it with fresh materials. Clean nesting boxes and roosting bars. Consider using a coop scraper or a shop vac to make the process easier. The frequency of cleaning can vary based on the number of chickens you have and the size of your coop. Regular cleaning helps prevent the build-up of ammonia and reduces the risk of disease. Dispose of waste properly, following local regulations. Use a disinfectant to sanitize the coop periodically, which can help remove harmful bacteria.
Seasonal Considerations
Adjust your coop maintenance to suit the changing seasons. During the winter, ensure the coop is well-insulated and protected from drafts. Provide extra bedding to keep the chickens warm. In the summer, make sure the coop has adequate ventilation and shade to prevent overheating. Monitor the water supply to ensure it doesn’t freeze in winter. In spring and fall, conduct a thorough inspection of the coop and make any necessary repairs. Consider adding seasonal decorations to enhance the beauty of the coop. These seasonal changes support the health and comfort of your flock throughout the year.
Troubleshooting Common Issues
Be prepared to address common issues such as pests, predator attacks, and health problems in your flock. Regularly inspect your coop for signs of pests like mites and lice, and take appropriate measures to control them. If you suspect a predator attack, reinforce your coop’s security immediately. Monitor your chickens for signs of illness, such as changes in behavior, decreased egg production, or respiratory problems. Consult with a veterinarian or poultry specialist if you have concerns about your chickens’ health. Addressing problems quickly helps to maintain a healthy and happy flock. Having a basic understanding of common problems ensures quick responses.
Building your own chicken coop can be a fulfilling experience, providing fresh eggs and a connection with nature. By following this comprehensive guide, you can create a functional, attractive, and safe home for your chickens. Remember to plan carefully, choose the right materials, and maintain your coop regularly. With proper planning and execution, you’ll enjoy years of backyard chicken keeping. Happy building!