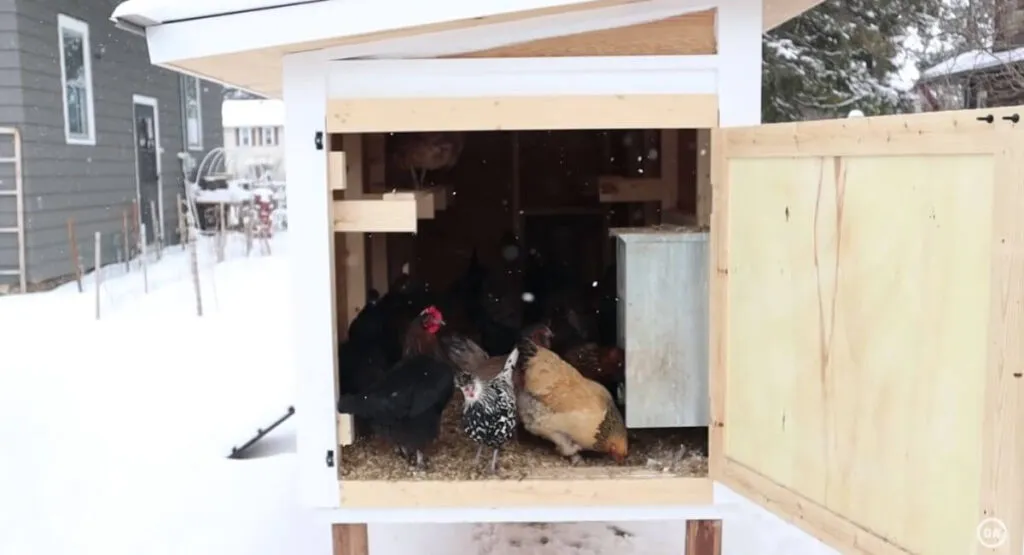
Why Insulating Your Chicken Coop is Essential
Insulating your chicken coop is a crucial step in ensuring the health, happiness, and productivity of your flock. Chickens, while hardy, are susceptible to extreme temperatures. Proper insulation creates a more stable and comfortable environment, protecting them from both the biting cold of winter and the scorching heat of summer. This not only improves their well-being but also helps maintain egg production, as extreme temperatures can significantly impact a hen’s laying cycle. Moreover, a well-insulated coop can help to reduce energy costs by minimizing the need for supplemental heating or cooling.
Temperature Regulation for Happy Hens
Chickens are most comfortable within a specific temperature range. Insulation helps maintain this range by reducing heat loss in winter and preventing excessive heat gain in summer. During winter, insulation traps the chickens’ body heat, keeping the coop warmer. In summer, it helps to reflect solar radiation and prevent the coop from overheating. This temperature regulation prevents stress on the chickens, which can lead to illness, reduced egg production, and even death. Consistent temperatures are key to a healthy and productive flock.
Benefits of Insulation beyond Temperature

Beyond temperature regulation, insulation offers several other benefits. It helps to reduce drafts, which can be detrimental to chicken health, especially during cold weather. Insulation also helps to minimize condensation, which can lead to the growth of mold and mildew, creating an unhealthy environment. Furthermore, insulation can act as a sound barrier, reducing noise from outside and inside the coop, which can minimize stress on the birds. Finally, a well-insulated coop is often more energy-efficient if you use supplemental heating or cooling, saving you money on utility bills.
Top 7 Pro Tips for Insulating Your Chicken Coop
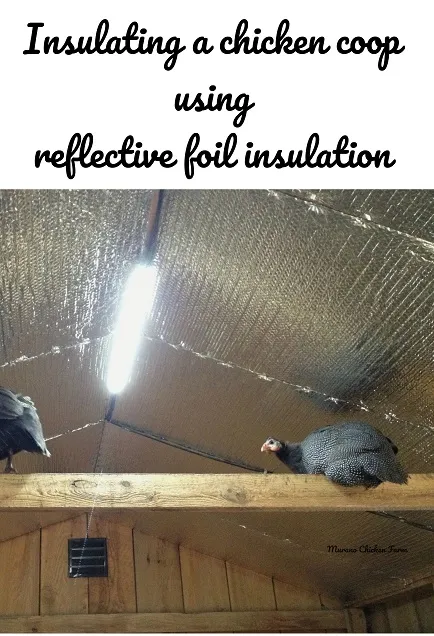
Tip 1 Choose the Right Insulation Materials
Selecting the appropriate insulation materials is the first and most critical step. Several options are available, each with its pros and cons. The best choice often depends on your budget, climate, and the coop’s design. Consider factors like moisture resistance, pest resistance, and ease of installation. Common materials include fiberglass batts, foam board, spray foam, and natural options like sheep’s wool or recycled denim. Proper research on the best material is crucial for the wellbeing of your chickens.
Understanding R-Value and its Importance

R-value measures an insulation material’s resistance to heat flow. Higher R-values indicate better insulating properties. The R-value needed for your coop depends on your local climate. Colder climates require higher R-values than warmer ones. When choosing insulation, check the R-value per inch of thickness to compare different materials. Proper R-value is essential for maintaining a stable temperature inside the coop, protecting your chickens from extreme cold and heat.
Popular Insulation Choices and Their Pros/Cons
- Fiberglass Batts Easy to install and relatively inexpensive, but can absorb moisture and are not pest-resistant.
- Foam Board Provides good insulation and moisture resistance, but can be more expensive and may require careful cutting.
- Spray Foam Excellent insulation and air sealing, but requires professional installation and can be costly.
- Natural Insulation Eco-friendly options like sheep’s wool or recycled denim offer good insulation and are often pest-resistant, but may be more expensive.
Tip 2 Prepare the Coop for Insulation
Before installing insulation, thoroughly prepare the coop. This involves cleaning the coop and inspecting it for any structural issues. Repair any damage, such as holes or cracks, that could compromise the insulation’s effectiveness. Seal any drafts to prevent heat loss. Preparing the coop correctly ensures the insulation functions optimally and lasts longer. This step is essential for maximizing the benefits of your insulation efforts.
Cleaning and Inspecting the Coop Structure

Start by thoroughly cleaning the coop to remove any dirt, debris, or droppings. Inspect the structure for any signs of damage, such as rotting wood, cracks, or loose boards. Address any issues before installing insulation to ensure a solid and stable foundation. Cleaning also helps to eliminate pests and prevent them from nesting in the insulation. This also means you need to inspect your coop regularly.
Addressing Existing Damage and Drafts
Repair any structural damage promptly. Seal any cracks or gaps with caulk or weatherstripping to eliminate drafts. Ensure the coop is weathertight to prevent moisture intrusion. Addressing drafts is crucial, as they can significantly reduce the effectiveness of the insulation. Check the roof, walls, and floor for any potential entry points for air and seal them accordingly. Use proper tools when preparing the coop and consult professionals if you are in doubt.
Tip 3 Install Insulation Effectively
Proper installation is key to maximizing the insulation’s performance. Follow the manufacturer’s instructions carefully. Ensure the insulation fits snugly without gaps or compression. If using batts or rolls, cut them to fit the spaces between studs and joists. For foam board, cut it precisely to fit the walls. Correct installation prevents air leaks and ensures the insulation’s R-value is fully realized. Poor installation can significantly reduce the effectiveness of even the best insulation material.
Best Practices for Insulation Placement

Insulate the walls, roof, and floor of the coop. Ensure the insulation fills all cavities completely, without any gaps or voids. For walls, install insulation between the studs. For roofs, insulate between the rafters, and consider adding a layer of insulation below the roof deck. For the floor, insulate between the joists, paying attention to sealing any gaps around the perimeter. Using appropriate tools and materials is also vital for proper placement.
Avoiding Common Installation Mistakes
Avoid common mistakes such as leaving gaps, compressing the insulation, or not using a vapor barrier where needed. Gaps and voids reduce the insulation’s effectiveness, while compression can diminish its R-value. Ensure the insulation is installed correctly to prevent moisture buildup, which can damage the insulation and promote mold growth. Always follow the manufacturer’s instructions and consult with a professional if needed.
Tip 4 Focus on Ventilation
While insulation keeps heat in, ventilation is essential for removing moisture and preventing the buildup of harmful gases. A balance between insulation and ventilation is crucial. Without proper ventilation, moisture from the chickens’ droppings and breath can accumulate, leading to mold and mildew. Proper ventilation also helps regulate humidity levels, contributing to a healthier environment for your flock. It helps by removing odors from the coop.
Balancing Insulation and Airflow
Ensure adequate ventilation to prevent moisture buildup. This involves providing vents near the roofline to allow moist air to escape. Balance the amount of insulation with the ventilation to prevent the coop from becoming overly stuffy. Ventilation also helps to control odors and maintain air quality. Consider the number of chickens in your coop when determining the required ventilation. This will also depend on your climate.
Ventilation Strategies to Prevent Moisture Buildup
Install vents near the roofline and ensure they are properly sized. Consider using a ridge vent or gable vents for effective airflow. Avoid blocking the vents with insulation or other materials. Place vents strategically to promote cross-ventilation and air circulation. Regular cleaning and maintenance of the ventilation system are also essential to ensure it functions correctly. Ventilation is a crucial step, otherwise, the work you put in with your insulation will be pointless.
Tip 5 Protect Insulation from Moisture and Pests
Moisture and pests can significantly damage insulation and reduce its effectiveness. Use vapor barriers to prevent moisture from entering the insulation. Take pest control measures to prevent rodents and insects from nesting in the insulation. Protecting the insulation from moisture and pests is essential for its longevity and performance. This includes regular inspections, maintenance, and the use of appropriate materials and methods. Protecting your coop is essential for the wellbeing of your chickens.
Using Vapor Barriers and Pest Control Measures

Install a vapor barrier on the warm side of the insulation to prevent moisture from migrating into the insulation. Choose pest-resistant insulation materials or add pest control measures, such as wire mesh, to prevent rodents and insects from accessing the insulation. Regularly inspect the coop for signs of pests and address any infestations promptly. Taking the right precautions is essential for a long lasting coop.
Regular Inspections and Maintenance
Regularly inspect the insulation for any signs of damage, such as moisture, pests, or compression. Clean any spills or messes promptly to prevent moisture buildup. Make necessary repairs or replacements as needed. Regular maintenance extends the life of the insulation and ensures it continues to perform effectively. A coop in top condition will give you healthier chickens. Pay attention to detail to keep a safe coop.
Tip 6 Consider Coop Size and Location
The size and location of your coop influence your insulation needs. A larger coop may require more insulation than a smaller one. The climate in your area also impacts the type and amount of insulation needed. Consider the amount of sunlight the coop receives and its exposure to wind and other weather elements. This helps to determine the specific insulation requirements for your coop and ensures your chickens’ comfort. Proper insulation will improve the quality of life of your flock.
Adapting Insulation to Different Climates
Adjust the insulation strategy to suit your local climate. In cold climates, use higher R-values and focus on sealing drafts. In hot climates, prioritize ventilation and consider using reflective insulation to reduce heat gain. Be prepared to adapt your approach to changing weather conditions. If you live in a very hot area, then consider using a cooling system in addition to your insulation. If you live in a very cold area, then consider using a heating system in addition to your insulation.
Insulation Needs in Various Coop Designs
Different coop designs may require different insulation approaches. For example, a coop with a sloped roof may require a different insulation strategy than one with a flat roof. Consider the coop’s construction materials and design when planning your insulation. Choose the most effective insulation solutions for the coop. If your coop is already built, you should consider the layout when planning your insulation efforts.
Tip 7 Maintaining and Monitoring Insulation
Regular maintenance and monitoring of your insulation are essential for ensuring its effectiveness. Inspect the insulation periodically for any signs of damage or wear. Make necessary repairs or replacements as needed. Properly maintaining your insulation helps to prolong its lifespan and ensure it continues to perform effectively. With proper care, your coop can last for many years.
Regular Checks for Damage and Effectiveness
Perform regular checks to assess the condition of the insulation. Look for signs of moisture, pest damage, or compression. Check for drafts or air leaks. Check the effectiveness of your insulation. Inspect it at least twice a year, or more often if you live in an area with extreme weather conditions. Regular checks will ensure everything is running as it should be.
Making Necessary Repairs and Upgrades
Address any damage or issues promptly. Repair any holes, cracks, or gaps to prevent air leaks. Replace damaged insulation with new material. Consider upgrading the insulation if needed, especially if you live in a climate with changing weather patterns. Making repairs and upgrades helps to maintain the effectiveness of your insulation and ensures your chickens’ comfort.
Conclusion Keeping Your Chickens Comfortable and Safe
Insulating your chicken coop is a worthwhile investment that contributes to the health, happiness, and productivity of your flock. By following the tips outlined in this guide, you can create a comfortable and safe environment for your chickens, regardless of the weather. Proper insulation, combined with good ventilation and regular maintenance, will ensure your chickens thrive for years to come. Keep in mind the tips provided will help to ensure a long lasting coop.