Lowe’s Chicken Coop Building Guide Overview
Embarking on a DIY project such as building a chicken coop can be a rewarding experience, providing fresh eggs and a charming addition to your backyard. This Lowe’s chicken coop guide will walk you through every step of the process, from choosing the right materials to the final finishing touches. Building your own coop allows you to customize it to your specific needs and the space you have available. Lowe’s offers a wide array of materials, tools, and accessories, making it a convenient one-stop shop for all your chicken coop needs. This guide is designed to help you navigate the process effectively and build a secure and comfortable home for your chickens.
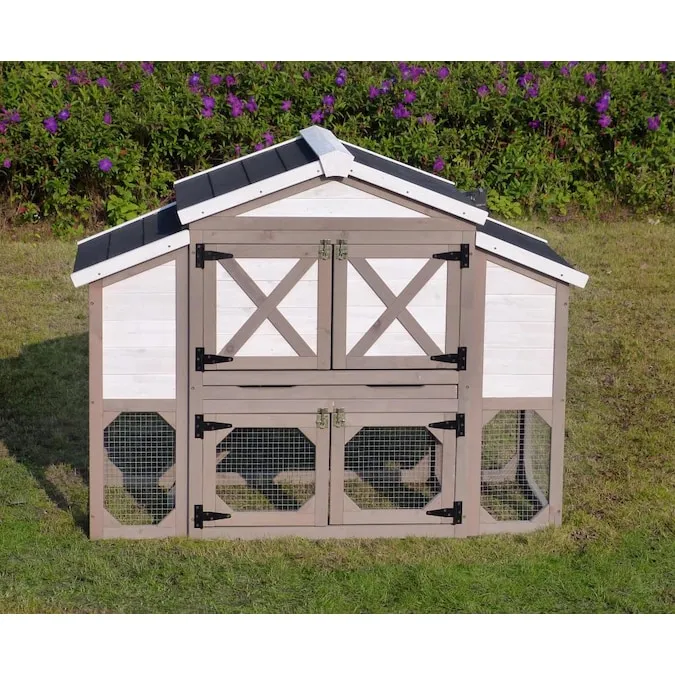
Choosing the Right Lowe’s Chicken Coop
Before you even pick up a hammer, carefully consider the size, location, and specific features you need for your chicken coop. This involves assessing your available space, the number of chickens you plan to keep, and local regulations. Lowe’s provides options for all these considerations. A well-planned coop not only ensures the comfort and safety of your chickens but also simplifies maintenance. Making a few early decisions can save you considerable time and money down the line. Properly planning will give you a great start!
Considerations for Size and Space

The size of your chicken coop is directly related to the number of chickens you intend to house. A general rule of thumb is to allow at least 4 square feet of space per chicken inside the coop and 8-10 square feet per chicken in the outdoor run. Overcrowding can lead to stress, disease, and pecking order issues among your flock. The location of your coop is also crucial. Choose a spot that offers both sun and shade, good drainage, and protection from prevailing winds. Consider proximity to your house for easy access, but keep in mind potential noise and odor.
Material Options at Lowe’s
Lowe’s offers a wide range of materials for building your chicken coop, each with its own advantages. Wood is a classic choice, providing good insulation and a natural look, but requires regular maintenance. Pressure-treated lumber is resistant to rot and pests, making it ideal for the foundation and areas exposed to the ground. Metal roofing offers durability and longevity, while asphalt shingles are a more budget-friendly option. Consider using hardware cloth instead of chicken wire for the run as it’s more secure against predators. Before selecting your materials, always check your local building codes to ensure compliance.
Essential Tools and Materials
Having the right tools and materials on hand will make your chicken coop building project much smoother and more efficient. Lowe’s has everything you need, so creating a detailed checklist will save you time and ensure you don’t have any mid-project interruptions. From measuring and cutting to fastening and finishing, having the right tools is crucial to achieving a high-quality build. Purchasing the best quality tools you can afford, even if it takes a little longer to get the project done, is the best way to go. This ensures that you won’t have to replace cheap tools during your construction.
Tools You’ll Need from Lowe’s

You’ll need a basic set of tools including a measuring tape, level, saw (circular, hand, or reciprocating), drill, screwdriver, hammer, and staple gun. Safety gear such as gloves, safety glasses, and a dust mask are essential. For cutting wood, a circular saw or hand saw is a must. A drill will be needed for screwing and screwing in screws, and a staple gun is required to attach the chicken wire or hardware cloth to the frame. Don’t forget a pencil and square for marking accurate cuts. Depending on the complexity of your design, you may need specialized tools such as a nail gun or a jigsaw for curves.
Materials Checklist from Lowe’s
Your materials list will vary depending on the size and design of your coop. You’ll likely need lumber for the frame, roof, and siding. Pressure-treated wood is great for the foundation. Roofing material, such as shingles or metal, is also essential. Chicken wire or hardware cloth, depending on your preference and predator protection needs, will be needed for the run. Other materials include screws, nails, hinges, latches, nesting boxes, roosting bars, and paint or sealant. Accurate measurements and a detailed plan are key to avoiding unnecessary trips to Lowe’s.
Step-by-Step Chicken Coop Building Guide
With your plan, tools, and materials ready, it’s time to start building. Following a detailed step-by-step guide will make the process manageable. Each step will have its own importance and proper execution. Remember to always prioritize safety and take your time to ensure accuracy. If you are a novice, ask an experienced friend or family member to assist, or consult with Lowe’s staff for guidance if you get stuck. Keep in mind that precision in each step will determine the overall structural integrity and longevity of your coop.
Foundation and Base Construction

Begin by preparing the foundation. This could be a concrete slab, a gravel base, or a frame made of pressure-treated lumber. If using a wooden frame, ensure it’s level and square. Attach the frame pieces together using screws. Once the frame is complete, you can start building the floor. If using a concrete base, make sure it’s properly cured before continuing. The foundation is critical for the structural integrity of your coop and should be built to withstand the elements and the weight of the structure.
Framing the Walls and Roof
Next, frame the walls by constructing the wall studs and securing them to the base frame. Ensure that the corners are square and the studs are plumb (perfectly vertical). Add top plates to the walls to complete the frame. Once the walls are up, you can start constructing the roof. This can be a simple shed roof or a more complex design, depending on your preference. The roof frame should be securely attached to the walls. Consider the pitch of the roof to ensure proper water runoff.
Adding Doors and Windows
Cut out the openings for the doors and windows. Frame these openings to reinforce them. Install the doors and windows using hinges and appropriate hardware. Make sure the doors fit snugly and can be easily opened and closed. Windows provide ventilation and natural light. Use hardware cloth or strong mesh to cover the windows for ventilation, while protecting your chickens from predators. Ensure that the doors and windows are secure and weather-resistant.
Installing the Chicken Wire and Run

Attach the chicken wire or hardware cloth to the frame of the run. This is crucial for the safety of your chickens, so secure it properly. Ensure that there are no gaps where predators could enter. Use staples or screws to attach the wire to the frame. Consider burying the wire a few inches underground to prevent digging predators from burrowing under the run. Double-check all of your attachments to make sure they are secure and that there are no sharp edges or loose pieces that could harm your chickens.
Interior Features for Your Coop
Designing the interior of your chicken coop is essential for the comfort and well-being of your chickens. This involves providing adequate space for nesting, roosting, and ventilation. The goal is to create a safe and comfortable environment that promotes egg-laying and overall health. Creating the right environment will make the chicken more comfortable, and will save you time and money in the long run.
Nesting Boxes Construction
Nesting boxes should be placed in a quiet, dimly lit area of the coop. The number of nesting boxes you need depends on the size of your flock; a general guideline is one box for every three to four hens. Build the boxes from wood, ensuring that they are the correct size to accommodate your chickens. Line the boxes with soft bedding such as straw or wood shavings. Make sure the boxes are easy to access for egg collection.
Roosting Bars Placement

Roosting bars provide a place for chickens to sleep at night. Place the bars at a comfortable height, about 2-3 feet off the ground, and away from drafts. The size and number of roosting bars depend on the number of chickens. Make sure there is enough space for each chicken to roost comfortably. Round or slightly rounded bars are best to provide a comfortable grip for the chickens’ feet. Position the bars away from the nesting boxes to keep them clean.
Ventilation and Airflow
Proper ventilation is crucial for maintaining a healthy environment inside the coop. Good ventilation helps to remove moisture, ammonia fumes, and excess heat. Provide ventilation by adding vents or windows, ideally positioned high in the coop. Avoid direct drafts that could chill your chickens. Ventilation is essential for preventing respiratory diseases and maintaining the health of your flock. Make sure that your coops has at least a couple of different points to prevent airflow from entering and leaving the same area.
Finishing Touches and Maintenance
Once the structure is complete, add finishing touches to enhance the durability and appearance of your chicken coop. Regular maintenance is crucial for extending its lifespan and ensuring the health of your chickens. From painting to weatherproofing and regular cleaning, this section covers all the important final steps to keep your chicken coop in top shape. You can prevent a lot of potential problems by following these simple steps.
Painting and Weatherproofing

Painting your chicken coop not only enhances its appearance but also protects the wood from the elements. Choose a paint that is non-toxic and safe for chickens. Apply a weatherproofing sealant to protect the wood from moisture and rot. Ensure that all exposed wood surfaces are protected from rain, snow, and sunlight. This step is essential for prolonging the life of your coop and keeping your chickens safe and dry.
Regular Cleaning and Maintenance
Regular cleaning is essential to prevent the buildup of bacteria and disease. Remove droppings and soiled bedding regularly. Clean the nesting boxes and roosting bars often. Conduct a thorough cleaning of the entire coop at least once a month. Check for any signs of damage or wear and tear. Make repairs promptly to prevent further deterioration. Properly maintained, your coop will provide your chickens with a safe and comfortable environment for years to come.
Dealing with Common Chicken Coop Issues
Even with the best construction and maintenance, you may encounter some common chicken coop issues. Being aware of these issues and how to address them will help you provide a healthy environment for your chickens. From pest control to predator protection, this section will provide insight to maintain the functionality of your coop.