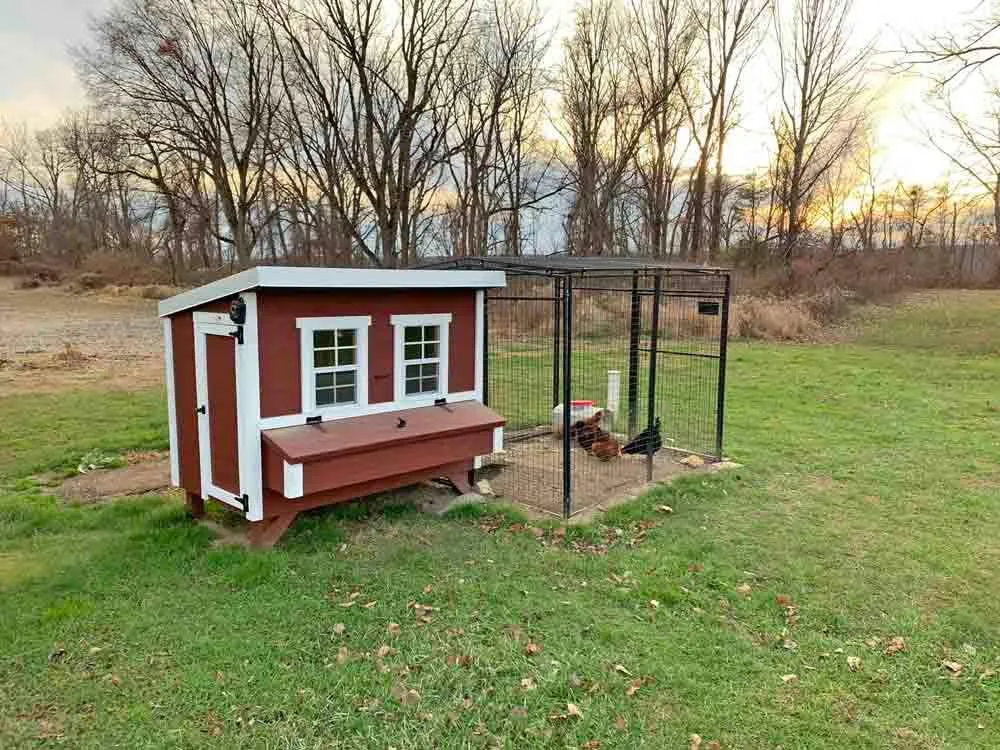
Building your own chicken coop can be a rewarding experience, providing fresh eggs and a connection to nature. The Overez Chicken Coop is a popular choice for its ease of assembly and durability. This comprehensive guide will walk you through every step, from gathering materials to placing your coop. Get ready to create a safe, comfortable home for your feathered friends, making backyard chicken keeping a breeze. With careful planning and execution, you’ll have a sturdy and attractive coop in no time, ensuring your chickens are happy and healthy, and you enjoy the benefits of fresh eggs daily. Follow our guide, and start building your own Overez Chicken Coop today!
Overez Chicken Coop Build Guide The Essentials
Before you begin, it is crucial to gather all the necessary materials and tools. The Overez Chicken Coop, known for its user-friendly design, typically requires specific components. Ensure you have a clear understanding of all the parts needed, including the pre-cut wooden panels, hardware (screws, nails, hinges), and any additional items like roofing materials. Proper preparation is the key to a smooth assembly process, making your project both efficient and enjoyable. Double-check your inventory against the coop’s instructions, and make sure you have everything before starting the build, setting the stage for a successful chicken coop construction experience.
Materials You Need
The materials for an Overez Chicken Coop are often included in a kit, but it’s important to verify that all items are present and in good condition. This usually includes pre-cut wooden panels (typically cedar or pressure-treated wood for weather resistance), roofing materials (such as asphalt shingles or metal sheeting), and hardware like screws, nails, hinges, and latches. You might also need wire mesh for the run, if the coop doesn’t include one, and any finishing materials such as paint or sealant. Consider adding a coop floor or lining for easier cleaning and protection. If your coop kit doesn’t include it, consider purchasing a good quality chicken feeder and waterer, as well as roosting bars. Ensuring all materials are ready to hand streamlines the building process and ensures you can complete the coop efficiently, providing a secure and comfortable home for your chickens.
Tools Required

Assembling your Overez Chicken Coop requires a selection of essential tools. You’ll need a screwdriver (both Phillips head and flathead), a drill, a hammer, and a measuring tape to ensure accurate cuts and alignments. A level is crucial for keeping the structure straight and stable. Safety glasses are non-negotiable to protect your eyes during the hammering and drilling. Gloves are also a good idea to protect your hands. Depending on the specific model, you might also need a saw for any necessary adjustments or modifications. Having all these tools readily available will make the build process smoother, faster, and safer, ensuring a well-constructed coop ready for your chickens.
Step-by-Step Assembly Instructions
With your materials and tools prepared, you’re now ready to begin the assembly. The Overez Chicken Coop, known for its ease of assembly, offers a straightforward build process with detailed instructions. Following these steps in order will ensure a sturdy and functional coop for your chickens. Taking your time and carefully following the manufacturer’s instructions is vital for a successful build. Remember to double-check each step as you go to avoid any mistakes. This will save time and ensure the longevity of your coop, providing your chickens with a safe and comfortable home.
Preparing the Base
Start by preparing the base for your Overez Chicken Coop. Choose a level spot in your yard to ensure the coop sits evenly and avoids any structural instability. You may need to clear the area of grass, rocks, or any obstructions. You can either build a base directly on the ground or, for added protection against moisture and pests, consider a raised base made of wood or concrete. If you opt for a raised base, ensure it’s level and stable before placing the coop components. Properly preparing the base provides a solid foundation for your coop, which is essential for its durability and long-term use. It will protect your coop from ground moisture and also assist in leveling your coop.
Building the Frame

The frame of your Overez Chicken Coop forms the structural backbone. Start by assembling the walls, typically by attaching the pre-cut wooden panels. Follow the instructions provided, ensuring that all pieces are securely fastened with screws or nails. Pay close attention to the alignment and squareness of the frame, using a level and measuring tape to ensure accuracy. Once the walls are up, move on to the roof frame. Ensure the frame is firmly attached to the walls, creating a sturdy and stable structure. A properly built frame is crucial as it supports the entire weight of the coop. Careful attention to this step will guarantee your coop is durable and can withstand the elements, protecting your chickens for many years to come.
Attaching the Walls and Roof
Once the frame is complete, attach the walls and roof panels. Securely attach the pre-cut wall panels to the frame, using screws or nails as directed. Make sure all panels fit flush against each other to create a weather-resistant barrier. When installing the roof, ensure it’s properly aligned and securely fastened, using the appropriate roofing material such as shingles or metal sheets. Consider the overlap and sealing of the roofing materials to prevent leaks. This step is crucial for weather protection, as the roof protects your chickens from rain and sun. Proper attachment of walls and the roof will add to your coop’s longevity and effectiveness in sheltering your chickens.
Installing Doors and Windows
The doors and windows are critical components for access, ventilation, and light. Install the doors, ensuring they open and close smoothly, and secure them with hinges and latches. The latches should be robust enough to keep predators out. Next, install the windows, if the coop includes them. Make sure the windows are securely fastened, and consider adding wire mesh for added security and ventilation. Ensure that any openings are properly sealed to prevent drafts and water from entering the coop. Well-installed doors and windows provide security, access, and essential airflow, contributing to a safe and comfortable environment for your chickens. Make sure the door opens to the outside of the coop, so the chickens have access to the run.
Adding Interior Features

Enhance the interior of your Overez Chicken Coop with essential features. Install roosting bars at a comfortable height for the chickens to sleep on. Position the feeder and waterer in a location that’s easily accessible but won’t be fouled by droppings. Consider adding nesting boxes, placing them in a dimly lit and secluded area to encourage egg laying. Line the nesting boxes with soft bedding. Ensure the interior is well-ventilated, with adequate airflow to reduce odors and humidity. Thoughtfully adding these interior features creates a comfortable and functional space, promoting the health and productivity of your chickens. This will also help to maintain the overall hygiene of your coop.
Essential Considerations for Your Overez Chicken Coop
Beyond the basic construction, several essential considerations can enhance the functionality and safety of your Overez Chicken Coop. Planning for placement and location, ensuring proper ventilation and airflow, and implementing effective security measures are critical for the well-being of your chickens. These considerations will not only ensure your chickens’ comfort but also protect them from predators and the elements. Focusing on these key elements will make your coop more than just a structure; it will become a thriving, secure, and healthy home for your chickens, enhancing the overall experience of backyard chicken keeping.
Placement and Location
When choosing a location for your Overez Chicken Coop, consider several factors. Select a spot that receives both sunlight and shade, as chickens need both for health and comfort. Avoid low-lying areas that may flood, as well as areas with poor drainage. Ensure the coop is placed on a level surface. Also, consider proximity to your house for easy access and maintenance. Think about the direction of prevailing winds, and position the coop to minimize exposure to harsh weather. Consider any potential noise issues or local ordinances. A well-chosen location will contribute to the health and happiness of your chickens, as well as make your coop a practical and enjoyable addition to your property. Don’t put the coop right next to your neighbor’s fence.
Ventilation and Airflow

Adequate ventilation is essential for the health of your chickens and the longevity of your coop. Ensure the Overez Chicken Coop has proper airflow to prevent the build-up of ammonia, moisture, and odors. Ventilation is essential for preventing respiratory illnesses and maintaining a healthy environment. Consider the design of the coop, making sure there are vents that allow air to circulate without creating drafts that can chill your chickens. Place the vents high enough to allow the warmer, humid air to escape while allowing fresh air to enter. Good ventilation helps remove excess moisture, reducing the risk of disease and keeping your chickens comfortable in all weather conditions. Regular cleaning is also essential for maintaining good air quality.
Security Measures
Protecting your chickens from predators is crucial. The Overez Chicken Coop should include robust security features to deter potential threats. Make sure the coop is constructed with durable materials, and that all openings are securely covered with wire mesh or hardware cloth. Bury wire mesh or hardware cloth around the perimeter of the coop to prevent digging predators. Ensure the doors and latches are secure and can’t be easily opened by predators. Regularly inspect the coop for any signs of damage or potential entry points. Implementing strong security measures will provide your chickens with a safe and secure home, giving you peace of mind and ensuring their survival, and also preventing any property damage.
Maintenance and Cleaning
Regular maintenance and cleaning are critical to keeping your Overez Chicken Coop in good condition and your chickens healthy. Consistent upkeep will not only extend the life of your coop but also contribute to the overall health and well-being of your flock. Adhering to a regular maintenance schedule ensures that any potential issues are identified and addressed promptly, and that your chickens live in a clean, safe environment. Making maintenance and cleaning a habit, along with providing fresh food and water daily will help you enjoy the benefits of a thriving flock for years to come.
Regular Inspections

Conducting regular inspections of your Overez Chicken Coop is essential. Check the coop weekly for any signs of wear and tear, damage, or potential predator entry points. Inspect the roof for leaks, the walls for cracks, and the doors and latches for proper function. Look for any signs of pest infestations, such as rodents or mites. Check the foundation to ensure it remains level and stable. Regular inspections allow you to address minor issues before they escalate into larger problems, saving you time and expense. By catching issues early, you can maintain the security, durability, and cleanliness of your coop, ensuring your chickens are safe and comfortable.
Cleaning Procedures
Implementing a regular cleaning schedule is a must. Remove droppings, soiled bedding, and any spilled food or water daily. Deep clean the coop at least once a month, removing all bedding and thoroughly washing the surfaces with a poultry-safe disinfectant. Allow the coop to dry completely before replacing the bedding. Consider using a coop cleaner that is specifically formulated for chicken coops. This helps to maintain a clean and healthy environment for your chickens, minimizing the risk of disease and attracting pests. Regular cleaning prevents the build-up of ammonia and odors, creating a more pleasant experience for both you and your chickens. Keeping a clean coop will also keep your chickens laying delicious and healthy eggs.
Common Issues and Solutions
Even with careful planning and construction, you might encounter some common issues with your Overez Chicken Coop. Addressing these problems promptly can prevent them from escalating and causing more significant headaches. By understanding the potential issues and knowing how to address them, you can ensure your coop remains functional and your chickens stay safe and healthy. This knowledge will help you maintain your coop with confidence and keep your flock happy and productive. Be proactive in identifying and addressing any issues early on to prevent them from getting worse. Being prepared can make all the difference in your backyard chicken-keeping experience.
In conclusion, building an Overez Chicken Coop is a rewarding DIY project that provides a safe and comfortable home for your chickens. Following this step-by-step guide, you can ensure a successful build and create a haven for your feathered friends. Remember to focus on proper preparation, careful assembly, and regular maintenance. Enjoy the process, and the fresh eggs will be your delicious reward!